不啰嗦 直接上步骤
步骤1.开发环境配置
项目需要node.js 做前端支撑 官网下载地址:
http://nodejs.cn/download/
根据自己需要下载对应的版本,我下载的是windows系统64位的版本。
包下载好后 进行安装,安装步骤在此省略...
测试是否安装成功
如果是window 按住键盘Win+R 输入cmd 在终端里面输入
node -vnpm-v如果安装成功会出现安装的node npm 的软件版本号,否则为安装失败。如下图

因为一些原因 npm 下载包巨慢 你懂得,所以我们这里选用淘宝镜像 打开终端 运行如下命令:
npm install -g cnpm --registry=https://registry.npm.taobao.org安装好后 运行命令:
cnpm -v
cnpm@9.2.0 (C:\Users\King\AppData\Roaming\npm\node_modules\cnpm\lib\parse_argv.js)
npm@9.8.1 (C:\Users\King\AppData\Roaming\npm\node_modules\cnpm\node_modules\npm\index.js)
node@18.17.0 (D:\Program Files\node\node.exe)
npminstall@7.11.1 (C:\Users\King\AppData\Roaming\npm\node_modules\cnpm\node_modules\npminstall\lib\index.js)
prefix=C:\Users\King\AppData\Roaming\npm
win32 x64 10.0.22621
registry=https://registry.npmmirror.com步骤2.构想分片上传逻辑,编写逻辑代码(核心)
基本思路:
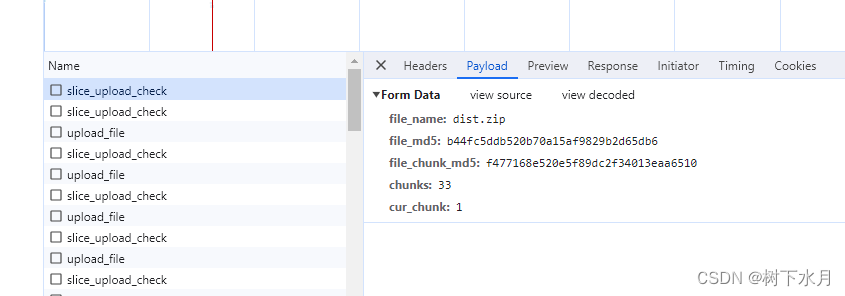
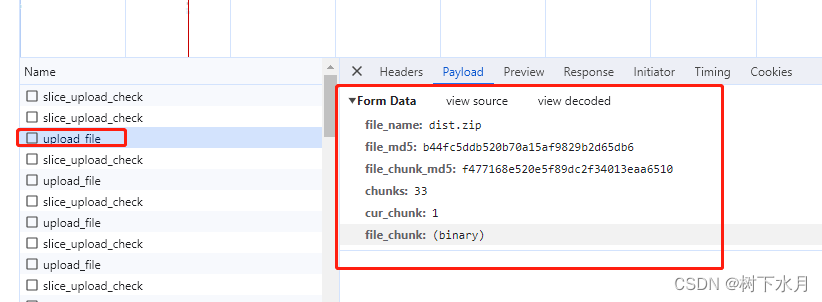
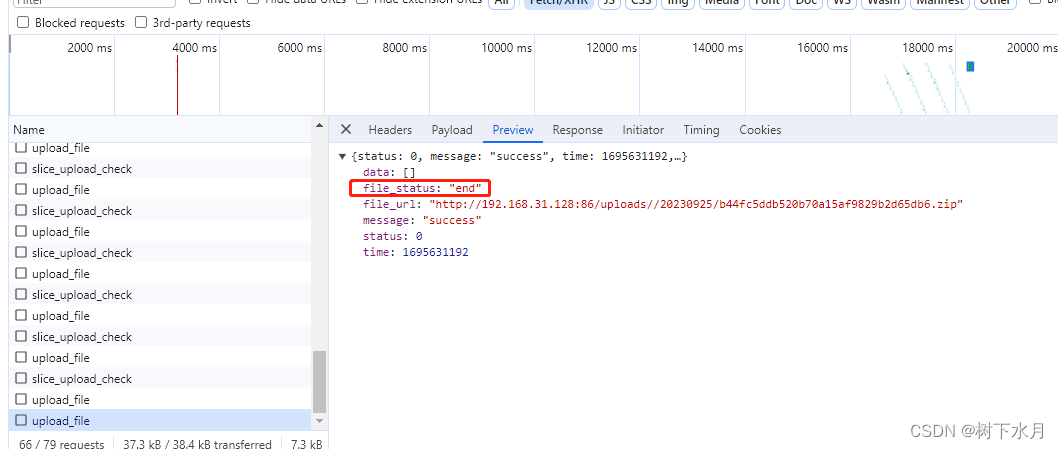
1)前端侧 :前端上传文件,根据分片大小,自动计算出整个文件的分片数量,以及分片二进制文件,以及整个文件的md5值,以及分片文件md5值,传与后端,后端处理完后,根据上传分片的进度以及后端返回状态,判断整个文件是否传输完毕,完毕后,前端展示完成进度。结束整个分片上传逻辑。
2)后端PHP侧:后端接收前端传过来的数据,包括文件名,文件md5,分片信息,然后将分片文件信息存储到redis 有序集合中,其中key为整个文件的md5 ,待所有分片文件都上传完后,根据顺序,然后将文件整合存储,然后完成整个文件分片上传逻辑。
下面我们来编写相关代码 :
前置条件 我们已经安装了此环境 环境如下:
| 运行环境 | 版本 |
| Linux | centos 7.7.1908 |
| PHP | 7.4.19 |
| redis | 6.2.1 |
| swoole扩展 | 4.8.13 |
| eayswoole | 3.5.1 |
首先我们需要使用到redis 部分代码如下:
首先配置redis 相关信息 此处我们将配置文件放在根目录下Config 目录 Redis.php中 代码如下:
[root@web1 easyswoole]# cd Config
ll
[root@web1 Config]# ll
总用量 28
-rw-r--r-- 1 root root 8725 9月  23 19:09 Common.php
-rw-r--r-- 1 root root 1450 9月   4 21:21 Iam.php
-rw-r--r-- 1 root root 3027 8月  29 18:47 Mimes.php
-rw-r--r-- 1 root root 1795 9月   4 19:21 Mysql.php
-rw-r--r-- 1 root root  948 9月  23 17:50 Redis.php
[root@web1 Config]# vim Redis.php<?php
return ['redis' => [# 默认redis 配置'REDIS' => ['host' => '127.0.0.1','port' => '6390','auth' => '123456','db' => '1','serialize' => 0],# token存储redis,用来设置接口权限'REDIS_LOCAL' => ['host' => '127.0.0.1','port' => '6390','auth' => '123456','db' => 5,'serialize' => 0],]
];
配置上传目录 后续Upload.php 控制器需要读取 Config/Common.php 代码如下:
<?php
use EasySwoole\EasySwoole\Config;
defined('BASEPATH') or define('BASEPATH', dirname(__FILE__) . '/../..');
defined('WEB_IP') or define('WEB_IP', '192.168.1.1');
return [// 此处省略其他配置信息 .....'WEB_IP' => WEB_IP,'WEB_PATH' => BASEPATH,'UPLOAD' => ['tmp_dir' => '/uploads_tmp/',//分片文件缓存目录'upload_dir' => '/uploads/',//文件现在目录],// 此处省略其他配置信息 .....
];
接下来需要定义连接池 直接上代码
cd App/Pool
touch RedisPool.php
<?php
/*** redis连接池配置处理*/namespace App\Pool;use EasySwoole\Pool\Config;
use EasySwoole\Redis\Config\RedisConfig;
use EasySwoole\Redis\Redis;class RedisPool extends \EasySwoole\Pool\AbstractPool {protected $redis_config;public function __construct(Config $conf, RedisConfig $redis_config) {parent::__construct($conf);$this->redis_config = $redis_config;}protected function createObject() {return new Redis($this->redis_config);}
}接下来,在入口文件EasySwooleEvent.php 注册redis 连接池
<?phpnamespace EasySwoole\EasySwoole;
use App\Pool\RedisPool;
use EasySwoole\Redis\Config\RedisConfig;class EasySwooleEvent implements Event {public static function mainServerCreate(EventRegister $register) {//其他逻辑 此处省略....//注册redis self::initRedis();//连接池热启动$register->add($register::onWorkerStart, function (\swoole_server $server, int $workerId) {if ($server->taskworker == false) {//每个worker进程都预创建连接$redis_arr = Config::getInstance()->getConf('redis');foreach ($redis_arr as $redis_name => $redis_conf) {\EasySwoole\Pool\Manager::getInstance()->get(strtolower($redis_name))->keepMin(10);//print_r(\EasySwoole\Pool\Manager::getInstance()->get(strtolower($redis_name))->status());}}});//其他逻辑 此处省略....}/*** 注册redis连接池*/public static function initRedis() {// 注册redis连接池$redis_arr = Config::getInstance()->getConf('redis');foreach ($redis_arr as $redis_name => $conf) {$config = new \EasySwoole\Pool\Config();$config->setMinObjectNum(8);$config->setMaxObjectNum(200);$config->setGetObjectTimeout(3.0);$redis_config = new RedisConfig($conf);//注册连接池管理对象\EasySwoole\Pool\Manager::getInstance()->register(new RedisPool($config, $redis_config), strtolower($redis_name));}}
}
接下来 新增相关路由信息
<?php
/** 路由*/
namespace App\HttpController;use EasySwoole\EasySwoole\Config;
use EasySwoole\Http\AbstractInterface\AbstractRouter;
use EasySwoole\Http\Request;
use EasySwoole\Http\Response;
use FastRoute\RouteCollector;class Router extends AbstractRouter
{function initialize(RouteCollector $routeCollector){$routeCollector->addGroup('/api/common', function (RouteCollector $router) {$router->post('/upload_file', '/Api/Upload/uploadFile'); //分片上传文件$router->post('/slice_upload_check', '/Api/Upload/checkFile'); //分片上传文件检测});}
}
Upload.php 相关控制器 代码如下:
<?php
/*** 文件上传(支持分片上传)*/namespace App\HttpController\Api;
use EasySwoole\Http\AbstractInterface\Controller;
use EasySwoole\EasySwoole\Config;
use EasySwoole\EasySwooleEvent;
use EasySwoole\RedisPool\Redis;
use EasySwoole\Http\Message\Stream;class Upload extends Controller
{/*** Notes: 存储文件到本地*/public function saveFileToLocalAction(){// $request = $this->request()->getRequestParam();$file = $this->request()->getUploadedFile('file');//上传的文件if (!$file) {return $this->returnMsg( [],50000,'上传出错请重试,请上传文件');}$tmp_file_name = $file->getClientFilename();$conf = Config::getInstance()->getConf();$dir = $conf["WEB_PATH"] . $conf['UPLOAD']['upload_dir'];if (!file_exists($dir)) {mkdir($dir, 0777);}$file_ext = uniqid();$suf_exp_arr = explode(".", $tmp_file_name);$file_name = $suf_exp_arr[0];#$move_to = $dir.$tmp_file_name;$move_to = $dir . $file_name . '_' . $file_ext . '.' . $suf_exp_arr[count($suf_exp_arr) - 1];if (file_exists($move_to)) {return $this->returnMsg( [],1,'已上传同名文件,请修改后再上传!');}if (!move_uploaded_file($file->getTempName(), $move_to)) {return $this->returnMsg( [],1,'上传失败,请稍后再试!');}$file_url = "http://" . $conf['WEB_IP'] . $conf['UPLOAD']['upload_dir'] . $file_name . '_' . $file_ext . '.' . $suf_exp_arr[count($suf_exp_arr) - 1];$return['file_url'] = $file_url;$return['img_url'] = $file_url;$return['file_name'] = $file_name . '_' . $file_ext . '.' . $suf_exp_arr[count($suf_exp_arr) - 1];return $this->returnMsg($return,0, "success");}/**** 文件检查* @return bool*/public function checkFile(){$request = $this->request()->getRequestParam();$suf_exp_arr = explode(".", $request['file_name']);$suf = $suf_exp_arr[count($suf_exp_arr) - 1];$can_upload_arr = ['zip','3G2','3GP','3GP2','3GPP','AMV','ASF','AVI','BIK','DIVX','DRC','DV','DVR-MS','EVO','F4V','FLV','GVI','GXF','M1V','M2T','M2TS','M2V','M4V','MKV','MOV','MP2V','MP4','MP4V','MPA','MPEG','MPEG1','MPEG2','MPEG4','MPG','MPV2','MTS','MTV','MXF','NSV','NUV','REC','RM','RMVB','RPL','THP','TP','TS','TTS','VOB','VRO','WMV','WTV','XESC','XMP','OGG','SWF','WEBM','GIF','264','601','692','800','801','av','avx','dat','dav','djl','dvr','g64','h3crd','h64','h264','jfv','jmv','kyd','lvf','mpk','nsf','nv4','ps','sdv','sv5','tm4',];if (!in_array(strtoupper($suf), $can_upload_arr) && !in_array(strtolower($suf), $can_upload_arr)) {return $this->returnMsg([], 30000, '请上传正确格式的文件');}//判断是否包含特殊字符if (strpos($suf_exp_arr[0], ',') !== false) {return $this->returnMsg([], 30000, '文件名不能包含英文逗号');}if (strpos($suf_exp_arr[0], ',') !== false) {return $this->returnMsg([], 30000, '文件名不能包含中文逗号');}$redis_key = $request['file_md5'] ?? '';$file_chunk_md5 = $request['file_chunk_md5'] ?? '';$status = \EasySwoole\Pool\Manager::getInstance()->get('redis')->invoke(function (\EasySwoole\Redis\Redis $redis) use ($redis_key, $file_chunk_md5) {$all_files = $redis->zRange($redis_key, 0, -1);if (in_array($file_chunk_md5, $all_files)) {$status = 1;} else {$status = 0;}return $status;});return $this->returnMsg([], $status);}/**** 文件上传*/public function uploadFile(){$request = $this->request()->getRequestParam();$all_chunk = $request['chunks'];//总分片数$now_chunk = $request['cur_chunk'];//当前分片//$original_filename = $request['original_filename']; //原始文件名$file = $this->request()->getUploadedFile('file_chunk');//上传的文件if (!$file) {$json = ['status' => 1,'message' => '上传出错请重试'];$this->response()->write(json_encode($json));return null;}$conf = Config::getInstance()->getConf();$dir = $conf["WEB_PATH"] . $conf['UPLOAD']['upload_dir'];$tmp_dir = $conf["WEB_PATH"] . $conf['UPLOAD']['tmp_dir'];//分片数据暂存文件夹if (!file_exists($dir)) {mkdir($dir, 0777);}if (!file_exists($tmp_dir)) {mkdir($tmp_dir, 0777);}$suf_exp_arr = explode(".", $request['file_name']);$suf = $suf_exp_arr[count($suf_exp_arr) - 1];if (move_uploaded_file($file->getTempName(), $tmp_dir . $request['file_chunk_md5'])) {//使用redis的有序集合存储文件名称用于合并$redis_key = $request['file_md5'];$file_status = \EasySwoole\Pool\Manager::getInstance()->get('redis')->invoke(function (\EasySwoole\Redis\Redis $redis) use ($redis_key, $request, $tmp_dir, $dir, $now_chunk, $all_chunk, $suf, $suf_exp_arr) {$redis->expire($redis_key, 7200); //2小时后过期$redis->zAdd($redis_key, $request['cur_chunk'] + 1, $tmp_dir . $request['file_chunk_md5']);if ($now_chunk == $all_chunk) {//文件合并$all_files = $redis->zRange($redis_key, 0, -1);if ($all_files && is_array($all_files)) {//创建要合并的最终文件资源$final_file = $dir . $request['file_md5'] . '.' . $suf;$final_file_handler = fopen($final_file, 'wb');foreach ($all_files as $k => $v) {$frag_file_handler = fopen($v, 'rb');$frag_file_content = fread($frag_file_handler, filesize($v));fwrite($final_file_handler, $frag_file_content);unset($frag_file_content);fclose($frag_file_handler); //关闭分片文件资源unlink($v); //删除已经合并的分片文件}$redis->zRemRangeByRank($redis_key, 0, -1);$save_path = $dir . "/" . date('Ymd', time());if (!file_exists($save_path)) {mkdir($save_path, 0777);}$new_file = $save_path . '/' . $request['file_md5'] . '.' . $suf;$status = rename($final_file, $new_file);return 'end';}} else {return 'ing';}});if (!in_array($file_status, ['end', 'ing'])) {$json = ['status' => 1,'message' => '上传出错请重试,重命名失败'];} else {$json = ['status' => 0,'message' => 'success','time' => time(),//'file_url' => "http://" . $conf["WEB_IP"] . $conf['UPLOAD']['upload_dir'] . $request['file_md5'] . '.' . $suf,//文件链接,'file_url' => "http://" . $conf["WEB_IP"] . $conf['UPLOAD']['upload_dir'] . '/' . date('Ymd', time()) . '/' . $request['file_md5'] . '.' . $suf,//文件链接,'data' => [],'file_status' => $file_status,];}} else {$json = ['status' => 1,'message' => '上传出错请重试'];}$this->response()->write(json_encode($json));}/*** @name: 返回值处理* @msg:* @param {array} $data* @param {int} $status* @param {string} $message* @param {array} $other* @param {int} $statusCode* @return {*}*/public function returnMsg(array $data = [], int $status = 0, string $message = 'success', array $other = [], int $statusCode = 200){$return = ['status' => $status,'message' => $message,'data' => $data,]; if ($other) {foreach ($other as $k => $v) {$return[$k] = $v;}}$this->response()->withHeader('Content-type', 'application/json;charset=utf-8')->withStatus($statusCode)->write(json_encode($return));$this->response()->end();return false;}}步骤3.后端测试好后,我们需要编写前端页面
前面已经说过 我们需要node npm 前端环境,如果已经安装好了 请忽略
1)我们在任意一个目录下 打开终端cmd 然后运行命令 安装vue 脚手架:
npm install -g @vue/cli2)创建一个新的Vue.js项目:
npm create vue@latest一路按一下回车键
如下图:
3)进入项目目录:
进入创建的Vue.js项目目录:
cd vue-project运行
npm install 4)安装axios 和 crypto-js
cnpm install axioscnpm install crypto-js5) 创建vue 实例
在Vue项目的入口文件中(通常是 src/main.js),创建Vue实例并将Vue组件添加到实例中。如下图:
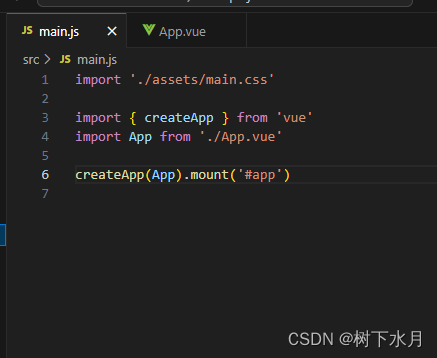
6)实现上传
在Vue项目的入口文件中 src/App.vue 编写如下代码:
<template><div><input type="file" ref="fileInput" @change="handleFileChange" /><button @click="uploadFile">上传</button><div v-if="uploadProgress > 0 && !uploadComplete">上传进度: {{ uploadProgress }}%</div><div v-if="uploadComplete">上传完成</div></div>
</template><script>
import axios from "axios";
import CryptoJS from "crypto-js";export default {data() {return {file: null,chunkSize: 1024 * 1024, // 分片大小(1MB)currentChunk: 1, // 当前分片totalChunks: 0, // 总分片数fileMD5: "", // 文件的MD5值uploadProgress: 0, // 上传进度uploadComplete: false, // 上传是否完成};},methods: {handleFileChange(event) {// 重置上传状态this.uploadProgress = 0;this.uploadComplete = false;this.fileMD5 = "";this.file = event.target.files[0];this.totalChunks = Math.ceil(this.file.size / this.chunkSize);// 计算整个文件的MD5值const fileReader = new FileReader();fileReader.onload = () => {const fileData = fileReader.result;const wordArray = CryptoJS.lib.WordArray.create(fileData);this.fileMD5 = CryptoJS.MD5(wordArray).toString(CryptoJS.enc.Hex);console.log(this.fileMD5);};fileReader.readAsArrayBuffer(this.file);},async uploadFile() {if (!this.fileMD5) {console.error("文件MD5值为空");return;}// 并发处理每个分片文件const promises = [];for (let i = 1; i <= this.totalChunks; i++) {const chunkMD5 = await this.calculateChunkMD5(i);// 发起检查分片状态的请求const checkFormData = new FormData();checkFormData.append("file_name", this.file.name);checkFormData.append("file_md5", this.fileMD5);checkFormData.append("file_chunk_md5", chunkMD5);checkFormData.append("chunks", this.totalChunks);checkFormData.append("cur_chunk", i);promises.push(axios.post("/api/SPAP1/api/common/slice_upload_check", checkFormData).then((checkResponse) => {if (checkResponse.data.status !== 0) {alert(checkResponse.data.message);console.error("分片状态检查失败,请上传正确格式的文件");throw new Error("分片状态检查失败");}// 发起分片上传请求const startByte = (i - 1) * this.chunkSize;const endByte = Math.min(i * this.chunkSize, this.file.size);const chunk = this.file.slice(startByte, endByte);const uploadFormData = new FormData();uploadFormData.append("file_name", this.file.name);uploadFormData.append("file_md5", this.fileMD5);uploadFormData.append("file_chunk_md5", chunkMD5);uploadFormData.append("chunks", this.totalChunks);uploadFormData.append("cur_chunk", i);uploadFormData.append("file_chunk", chunk);return axios.post("/api/SPAP1/api/common/upload_file", uploadFormData, {onUploadProgress: (progressEvent) => {// 计算并更新上传进度const chunkUploaded = Math.round((progressEvent.loaded / progressEvent.total) * 100);this.uploadProgress = ((i - 1) / this.totalChunks) * 100 + (chunkUploaded / this.totalChunks);},}).then((uploadResponse) => {// 检查上传请求的响应if (uploadResponse.data.status !== 0) {alert(uploadResponse.data.message);console.error("上传请求失败,请上传正确格式的文件");throw new Error("上传请求失败");}// 如果文件状态为 "end",标记上传完成if (uploadResponse.data.file_status == "end") {this.uploadComplete = true;}});}));}try {await Promise.all(promises);if (this.uploadComplete) {alert("上传完成");console.log("上传完成");}} catch (error) {console.error("上传失败", error);}},calculateChunkMD5(chunkNumber) {return new Promise((resolve) => {const startByte = (chunkNumber - 1) * this.chunkSize;const endByte = Math.min(chunkNumber * this.chunkSize, this.file.size);const chunk = this.file.slice(startByte, endByte);const reader = new FileReader();reader.onload = (e) => {const arrayBuffer = e.target.result;const wordArray = CryptoJS.lib.WordArray.create(arrayBuffer);const md5 = CryptoJS.MD5(wordArray).toString(CryptoJS.enc.Hex);resolve(md5);};reader.readAsArrayBuffer(chunk);});},},
};
</script>
7)考虑到上面的axios 发送接口会与前端报跨域报错 故此这里采用axios 代理模式 进行处理
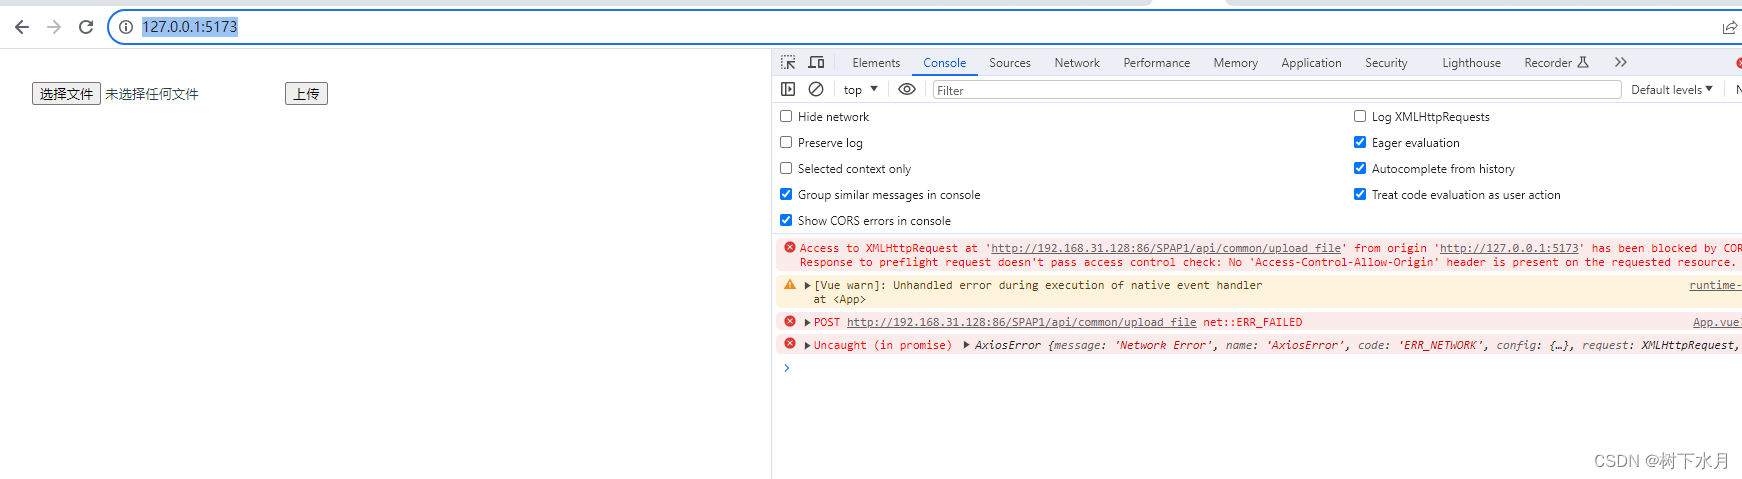
怎么解决跨域呢
在最外面的vite.config.js 文件中,加入server 这个参数
import { fileURLToPath, URL } from 'node:url'import { defineConfig } from 'vite'
import vue from '@vitejs/plugin-vue'// https://vitejs.dev/config/
export default defineConfig({plugins: [vue(),],resolve: {alias: {'@': fileURLToPath(new URL('./src', import.meta.url))}},server: {hmr: { overlay: false }, // 禁用或配置 HMR 连接 设置 server.hmr.overlay 为 false 可以禁用服务器错误遮罩层// 服务配置port: 8080, // 类型: number 指定服务器端口;open: false, // 类型: boolean | string在服务器启动时自动在浏览器中打开应用程序;cors: true, // 类型: boolean | CorsOptions 为开发服务器配置 CORS。默认启用并允许任何源proxy: {'/api': {target: 'http://192.168.31.128:86', // Your backend server URLchangeOrigin: true,pathRewrite: {'^/api': '', // Remove the '/api' prefix when forwarding the request},},}}
})
其中port 为前端页面端口 target 为后端接口地址 其他可以不变。
8)调试运行
在命令行运行调试命令:
npm run dev9) 打开页面
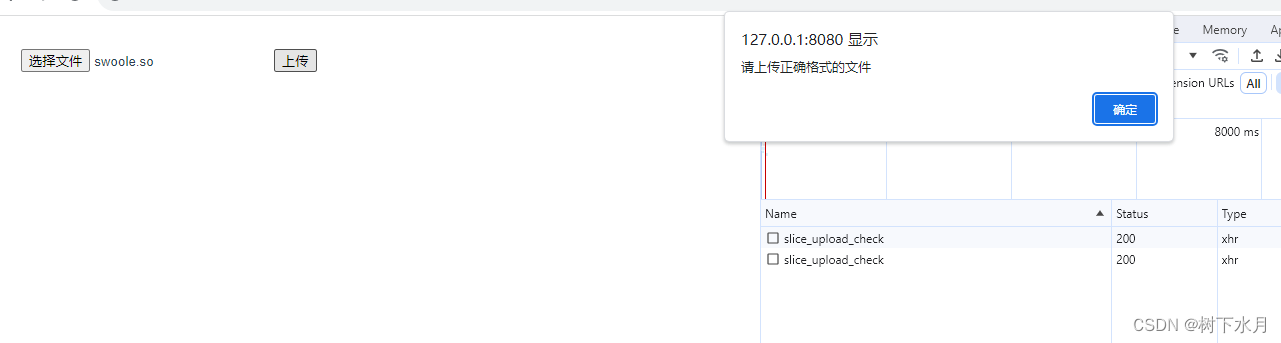
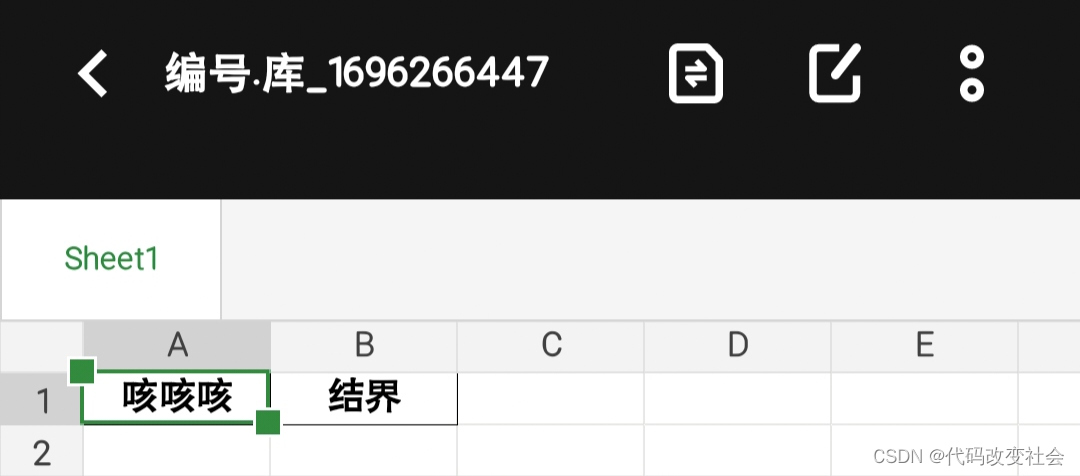
上传一个正常的文件
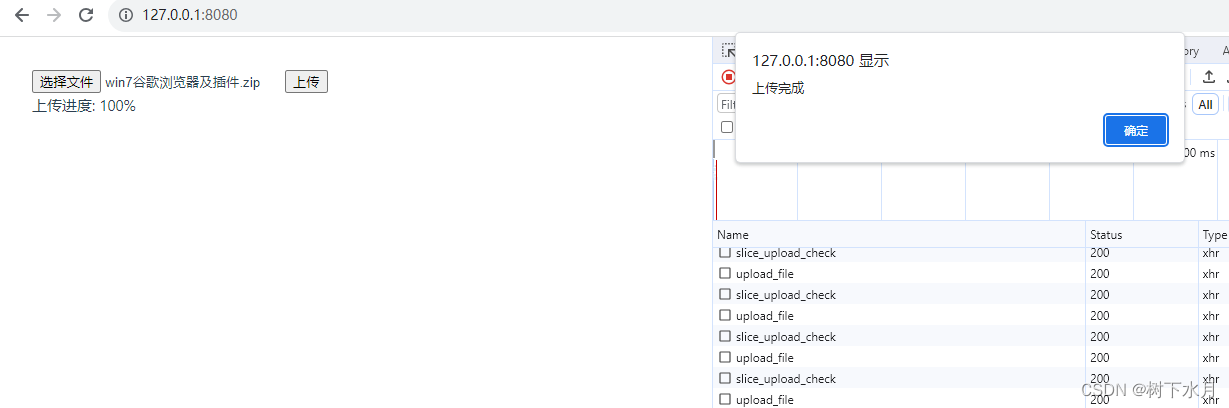

Nice 基本上整个文件分片上传就完成了


![[VIM]VIM初步学习-3](https://img-blog.csdnimg.cn/79331b3d50794ebeb24e4ed0ebeddb44.png)