python使用dlib的5点和68点的人脸检测
Dlib是一个非常流行的库,它提供了多种功能,包括人脸检测、面部特征点检测等。Dlib的面部特征点检测是基于一种叫做HOG(Histogram of Oriented Gradients,方向梯度直方图)的方法,并结合了机器学习方法,如SVM(Support Vector Machines,支持向量机)。
5点人脸检测
Dlib的5点人脸检测通常指的是检测人脸的关键点:左右眼睛的中心、鼻子尖端、左右嘴角。这是一种较为基础的人脸特征检测方法,适用于一些简单的应用场景,如人脸对齐、人脸关键部位定位等。
import cv2
import numpy as np
import time
import dlibdef detect_faces_and_nose(image):start_time = time.time()color_image = cv2.imread(image)if color_image is None:print("Error: Image not found!")returngray = cv2.cvtColor(color_image, cv2.COLOR_BGR2GRAY)face_detector = dlib.get_frontal_face_detector()landmark_predictor = dlib.shape_predictor("shape_predictor_5_face_landmarks.dat")    # 人脸检测faces = face_detector(gray)for face in faces:# 绘制人脸边界框x1, y1, x2, y2 = face.left(), face.top(), face.right(), face.bottom()cv2.rectangle(color_image, (x1, y1), (x2, y2), (0, 255, 0), 2)# 关键点检测landmarks = landmark_predictor(gray, face)points = [(landmarks.part(n).x, landmarks.part(n).y) for n in range(5)]# 绘制关键点for px, py in points:cv2.circle(color_image, (px, py), 2, (0, 0, 255), -1)# 计算鼻尖深度(使用索引2)if len(points) >= 3:px, py = points[2]print(f"鼻尖坐标:({px:4d}, {py:4d})")# 计算总耗时并控制打印频率current_time = time.time()duration = current_time - start_timeprint(f"耗时: {duration*1000:.2f}ms")# 保存并显示结果cv2.imwrite("output.png", color_image)cv2.imshow("Result", color_image)cv2.waitKey(0)cv2.destroyAllWindows()if __name__ == "__main__":detect_faces_and_nose("test.jpg")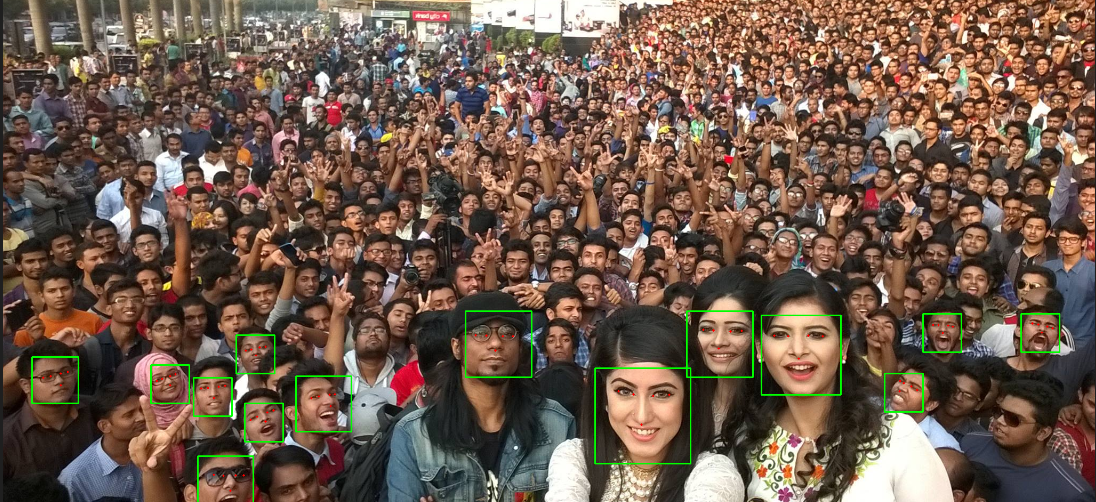
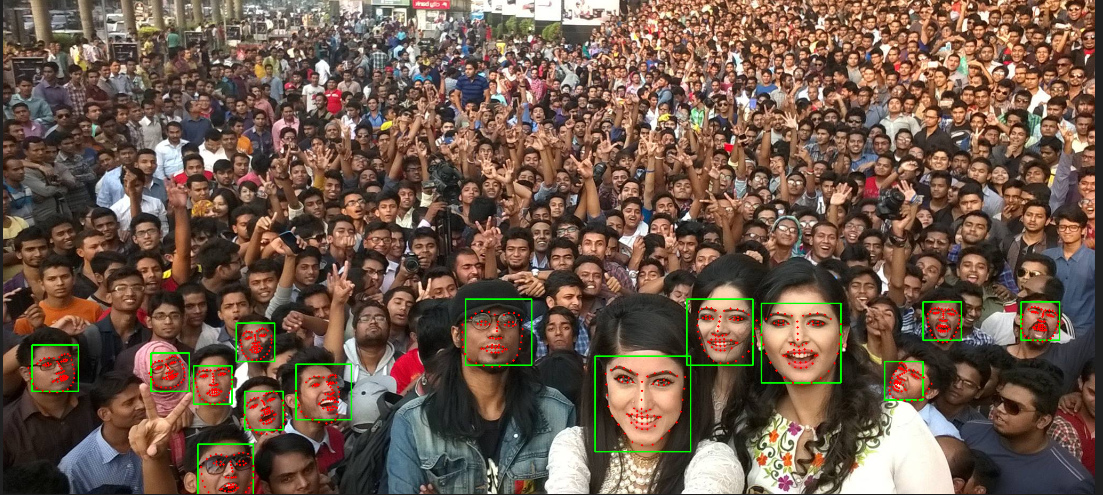
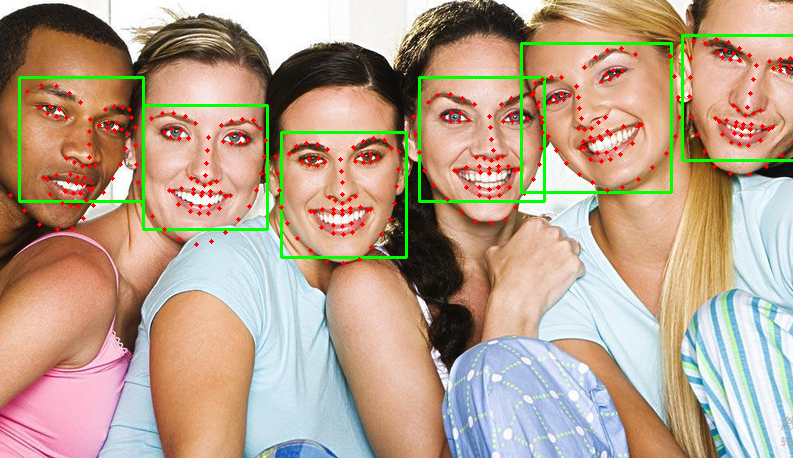
68点人脸检测
68点人脸检测指的是检测人脸的68个关键点,包括眼睛的眼角、眉毛、鼻子、嘴巴轮廓等。这种方法比5点检测提供了更详细的人脸特征信息,适用于需要高精度面部特征分析的应用场景。
import cv2
import numpy as np
import time
import dlibdef detect_faces_and_nose(image):start_time = time.time()color_image = cv2.imread(image)if color_image is None:print("Error: Image not found!")returnface_detector = dlib.get_frontal_face_detector()landmark_predictor = dlib.shape_predictor("shape_predictor_68_face_landmarks.dat")# 转换为灰度图像gray = cv2.cvtColor(color_image, cv2.COLOR_BGR2GRAY)# print(f"转换为灰度图像耗时: {(time.time() - start_time)*1000:.2f}ms")# 人脸检测faces = face_detector(gray)for face in faces:# 绘制人脸边界框x1, y1, x2, y2 = face.left(), face.top(), face.right(), face.bottom()cv2.rectangle(color_image, (x1, y1), (x2, y2), (0, 255, 0), 2)# 关键点检测landmarks = landmark_predictor(gray, face)points = [(landmarks.part(n).x, landmarks.part(n).y) for n in range(68)]# 绘制关键点for px, py in points:cv2.circle(color_image, (px, py), 2, (0, 0, 255), -1)# 计算鼻尖深度(68点模型中鼻尖的索引是30)if len(points) >= 30:px, py = points[30]print(f"鼻尖坐标:({px:4d}, {py:4d})")# 计算总耗时并控制打印频率current_time = time.time()duration = current_time - start_timeprint(f"耗时: {duration*1000:.2f}ms")# 保存并显示结果cv2.imwrite("output.png", color_image)cv2.imshow("Result", color_image)cv2.waitKey(0)cv2.destroyAllWindows()if __name__ == "__main__":detect_faces_and_nose("test.jpg")