Spring AI Alibaba - Milvus 初体验,实现知识库效果
先看效果
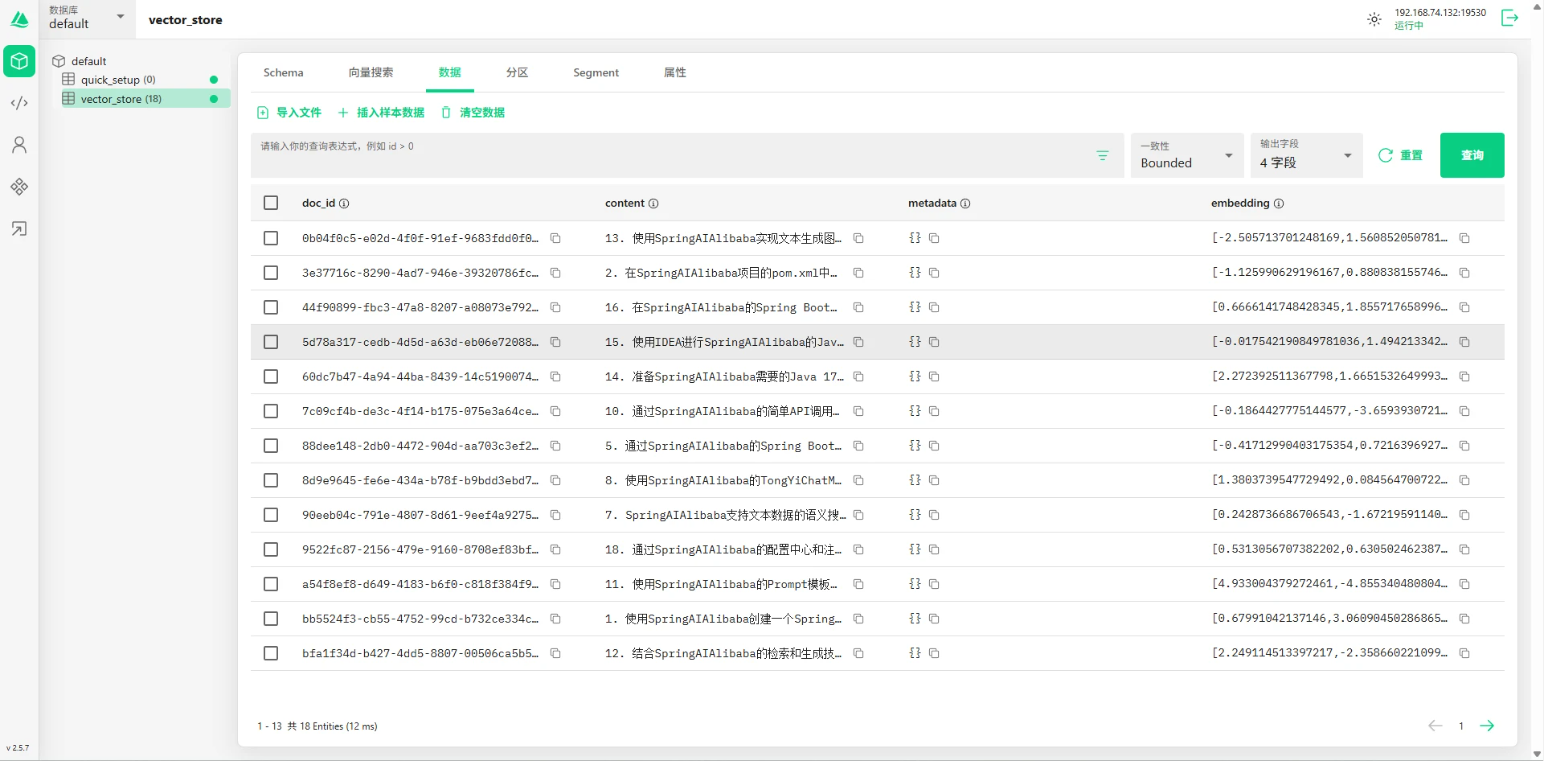
数据被存储在 milvus 中,包括原始数据和向量数据。
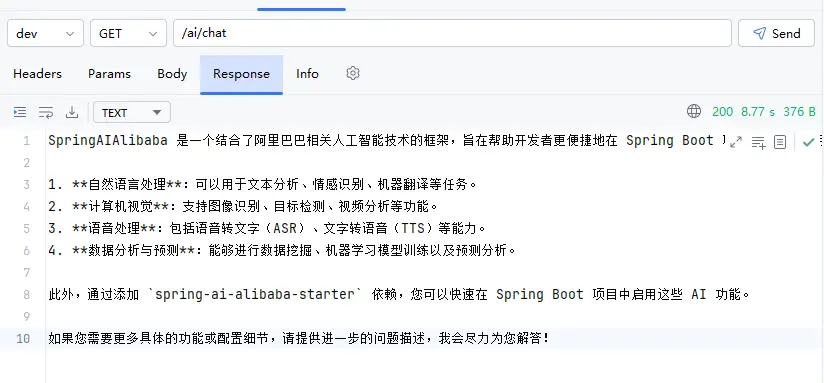
大模型使用向量化数据的回答:
环境准备
安装 milvus
Milvus 是一款专为向量相似性搜索设计的高性能开源数据库。
本地测试环境可以直接 Standalone 模式安装,需要用到 docker。
官方文档地址:https://milvus.io/docs/zh
官网安装:https://milvus.io/docs/zh/install_standalone-docker-compose.md
直接按照官方文档安装即可,安装后的效果如下: 会有三个容器,分别是:milvus-standalone、milvus-etcd和milvus-minio。安
装 Attu
Attu 是 Milvus 的官方 GUI 客户端,弥补了命令行工具 Milvus_cli 的不足,提供更直观的操作体验
docker run -d --name attu -p 8000:3000 -e MILVUS_URL=127.0.0.1:19530 zilliz/attu:v2.3.4
安装成功后docker容器中会多个 attu。访问地址:http://localhost:8000 进入 attu 界面:
Milvus 初体验
在 Milvus 中,也有类似于 MySQL 一样的数据库的概念,用来组织和管理数据的逻辑单元。
在数据库下是 Collections ,类似于MySQL的表。
在Collections中可以定义字段、存储数据。
依赖
创建 maven 工程后,先添加如下依赖:
<dependency><groupId>io.milvus</groupId><artifactId>milvus-sdk-java</artifactId><version>2.5.7</version>
</dependency>
可能会缺少 slf4j 依赖,添加一下就可以。
创建连接
MilvusClientV2 milvusClient = new MilvusClientV2(ConnectConfig.builder().uri("http://192.168.74.132:19530").build());
uri 是部署的 Milvus 链接地址。
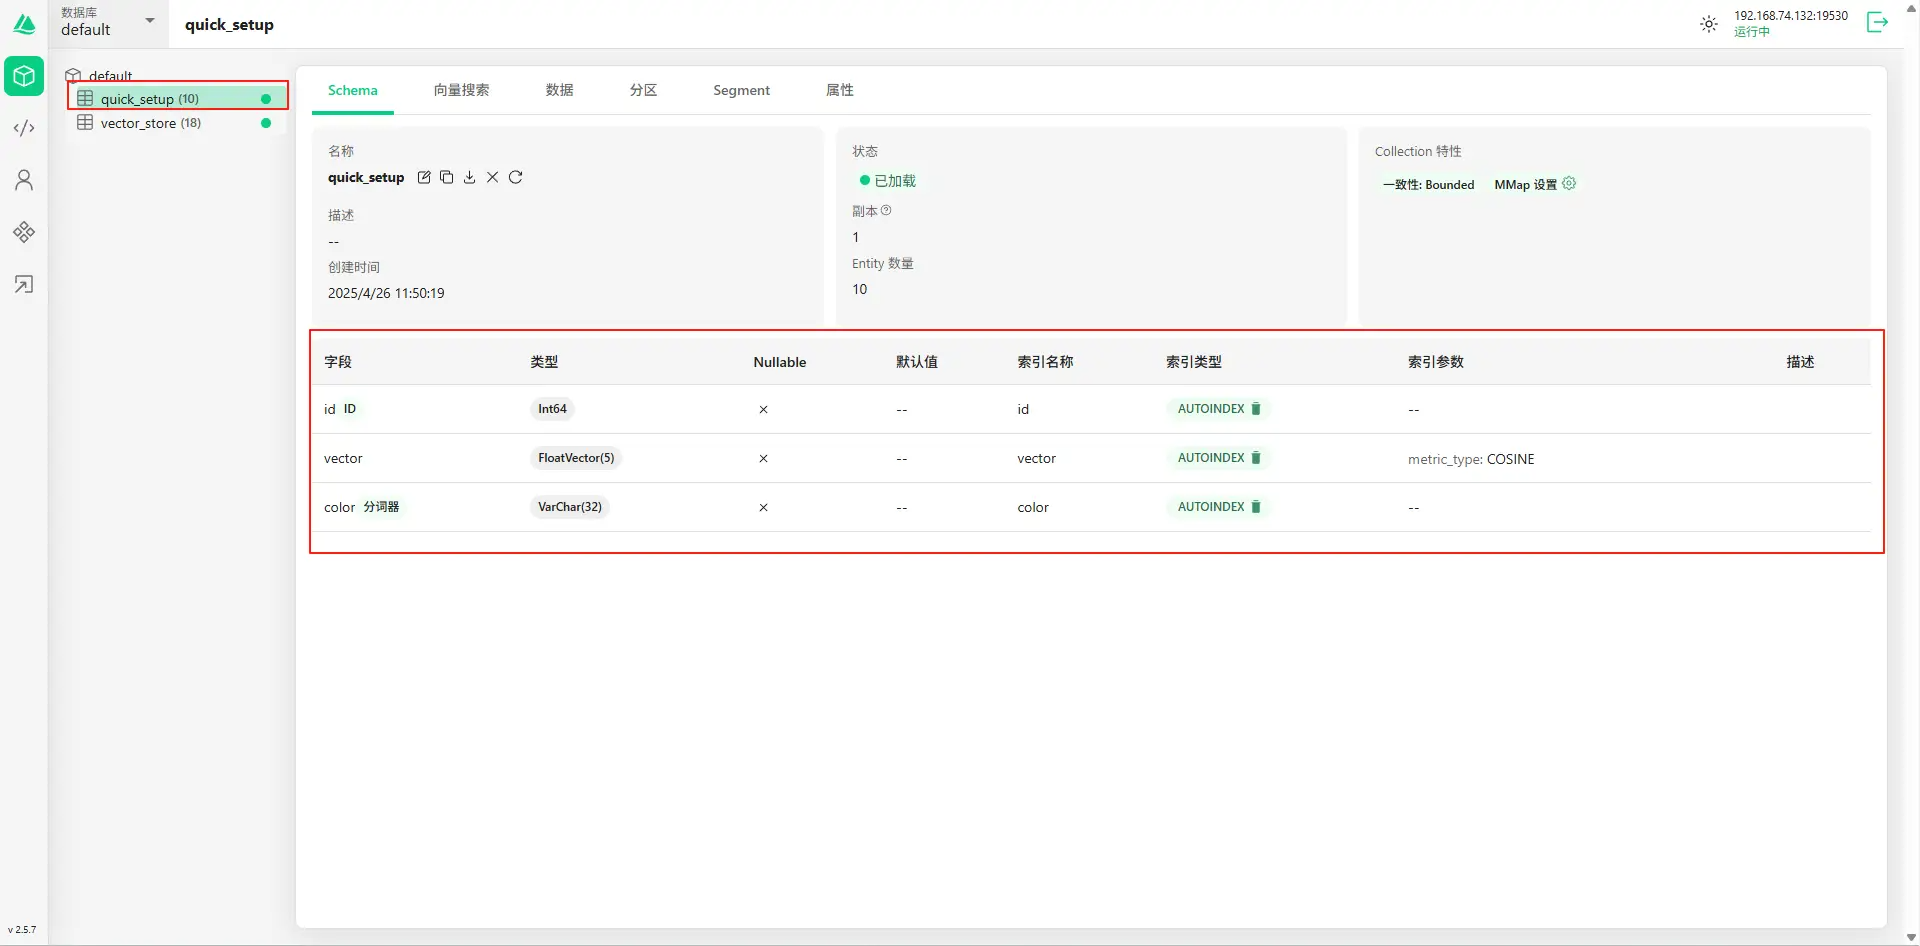
在 attu 中创建 Collections
选择 default 数据库,点击 创建Collections按钮,Collections 的名称为:quick_setup。添加字段:id、vector和color,最终创建好的 Collections 如下:
插入数据
使用 Java 代码插入,代码如下:
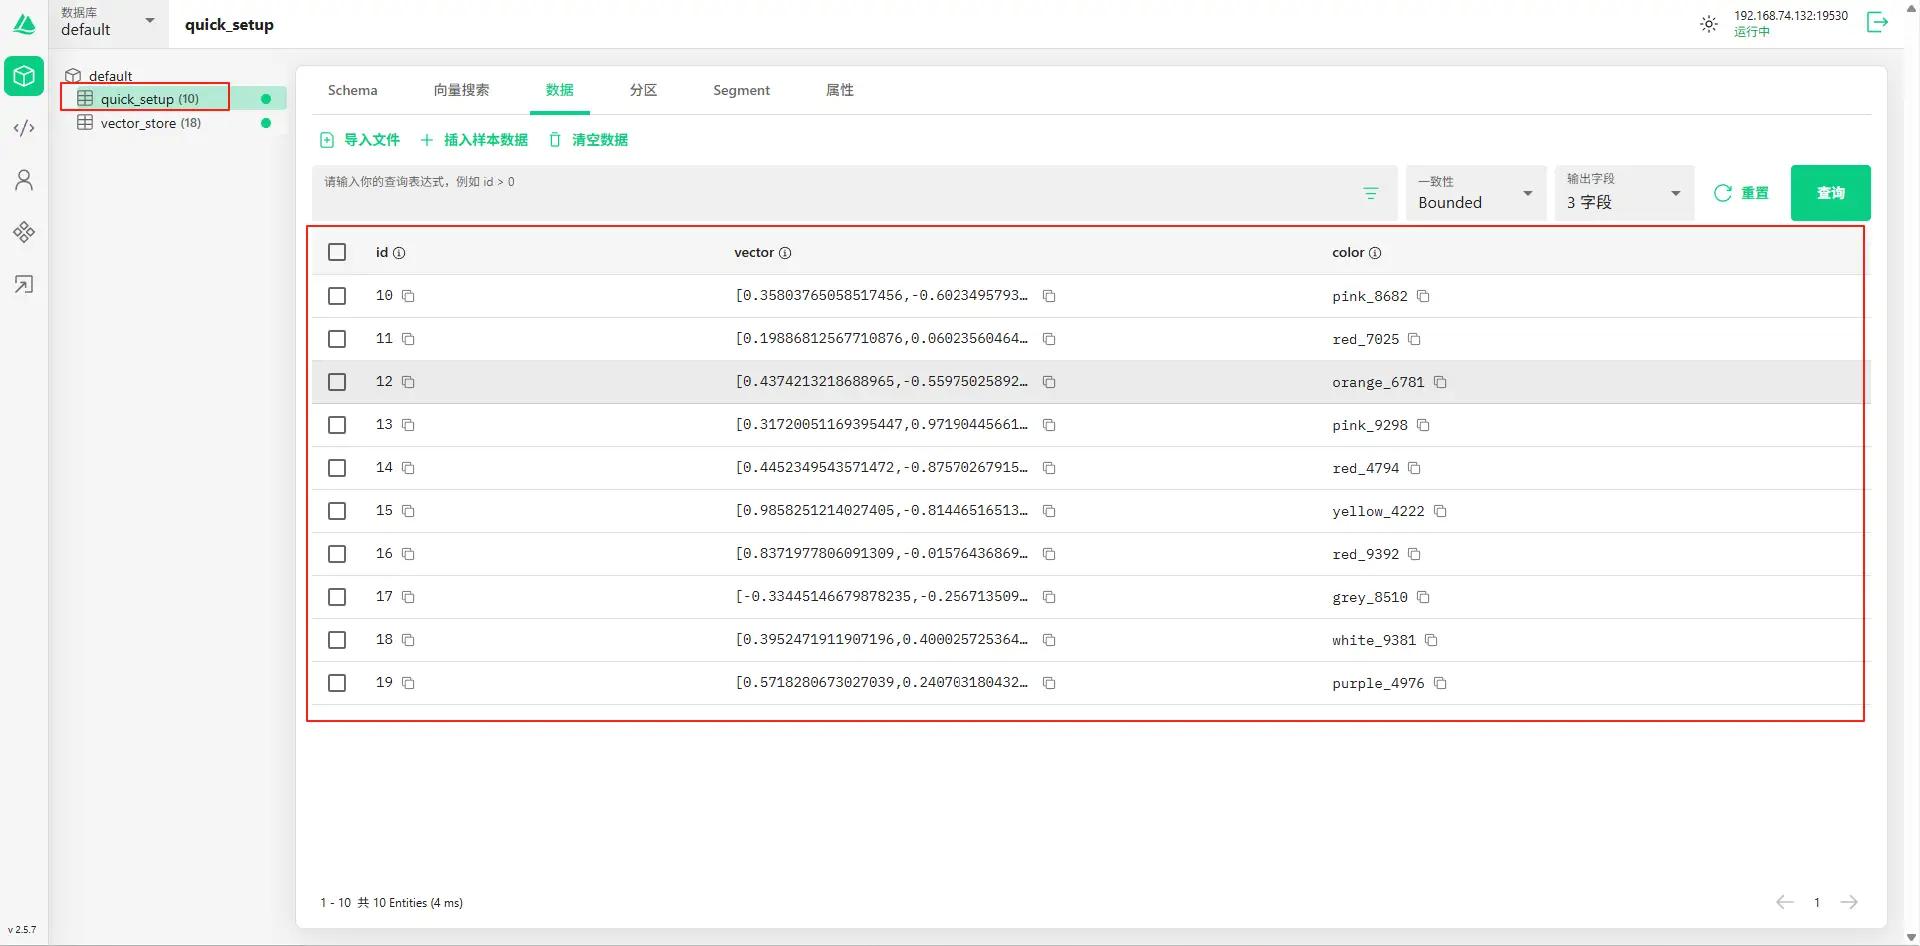
Gson gson = new Gson();List<JsonObject> data = Arrays.asList(gson.fromJson("{\"id\": 10, \"vector\": [0.3580376395471989f, -0.6023495712049978f, 0.18414012509913835f, -0.26286205330961354f, 0.9029438446296592f], \"color\": \"pink_8682\"}", JsonObject.class),gson.fromJson("{\"id\": 11, \"vector\": [0.19886812562848388f, 0.06023560599112088f, 0.6976963061752597f, 0.2614474506242501f, 0.838729485096104f], \"color\": \"red_7025\"}", JsonObject.class),gson.fromJson("{\"id\": 12, \"vector\": [0.43742130801983836f, -0.5597502546264526f, 0.6457887650909682f, 0.7894058910881185f, 0.20785793220625592f], \"color\": \"orange_6781\"}", JsonObject.class),gson.fromJson("{\"id\": 13, \"vector\": [0.3172005263489739f, 0.9719044792798428f, -0.36981146090600725f, -0.4860894583077995f, 0.95791889146345f], \"color\": \"pink_9298\"}", JsonObject.class),gson.fromJson("{\"id\": 14, \"vector\": [0.4452349528804562f, -0.8757026943054742f, 0.8220779437047674f, 0.46406290649483184f, 0.30337481143159106f], \"color\": \"red_4794\"}", JsonObject.class),gson.fromJson("{\"id\": 15, \"vector\": [0.985825131989184f, -0.8144651566660419f, 0.6299267002202009f, 0.1206906911183383f, -0.1446277761879955f], \"color\": \"yellow_4222\"}", JsonObject.class),gson.fromJson("{\"id\": 16, \"vector\": [0.8371977790571115f, -0.015764369584852833f, -0.31062937026679327f, -0.562666951622192f, -0.8984947637863987f], \"color\": \"red_9392\"}", JsonObject.class),gson.fromJson("{\"id\": 17, \"vector\": [-0.33445148015177995f, -0.2567135004164067f, 0.8987539745369246f, 0.9402995886420709f, 0.5378064918413052f], \"color\": \"grey_8510\"}", JsonObject.class),gson.fromJson("{\"id\": 18, \"vector\": [0.39524717779832685f, 0.4000257286739164f, -0.5890507376891594f, -0.8650502298996872f, -0.6140360785406336f], \"color\": \"white_9381\"}", JsonObject.class),gson.fromJson("{\"id\": 19, \"vector\": [0.5718280481994695f, 0.24070317428066512f, -0.3737913482606834f, -0.06726932177492717f, -0.6980531615588608f], \"color\": \"purple_4976\"}", JsonObject.class)
);InsertReq req = InsertReq.builder().collectionName("quick_setup").data(data).build();InsertResp resp = milvusClient.insert(req);
插入后的效果如下:
Spring Alibaba 使用 Milvus
创建项目
创建新的项目,引入依赖
<dependency><groupId>org.springframework.ai</groupId><artifactId>spring-ai-milvus-store-spring-boot-starter</artifactId>
</dependency>
引入依赖后,SpringBoot 会自动创建 MilvusVectorStore,通过 MilvusVectorStore 查询数据、插入数据等。
配置项目
spring:ai:vectorstore:milvus:client:host: 192.168.74.132 # milvus 地址port: 19530 # milvus 端口号embedding-dimension: 1536 # 向量维度initialize-schema: true # 是否初始化dashscope:api-key: sk-* # api-key
源码编写
创建 chatClient:
@Bean
ChatClient chatClient(ChatClient.Builder builder) {return builder.defaultSystem("你将作为一名 Spring-AI-Alibaba 的专家,对于用户的使用需求作出解答").build();
}
启动时将数据存入到 Milvus 中,创建 VectorDataInit 类继承 ApplicationRunner,代码如下:
@Configuration
public class VectorDataInit implements ApplicationRunner {private final Logger logger = LoggerFactory.getLogger(VectorDataInit.class);private final MilvusVectorStore vectorStore;public VectorDataInit(MilvusVectorStore vectorStore) {this.vectorStore = vectorStore;}@Overridepublic void run(ApplicationArguments args) {List<Document> documents = List.of(new Document("1. 使用SpringAIAlibaba创建一个Spring Boot项目,并添加spring-ai-alibaba-starter依赖。"),new Document("2. 在SpringAIAlibaba项目的pom.xml中添加Spring Milestone和Snapshot存储库。"),new Document("3. 通过SpringAIAlibaba申请阿里云通义API Key,在application.yml中进行配置。"),new Document("4. 使用SpringAIAlibaba的ChatClient和Prompt功能实现对话模型。"),new Document("5. 通过SpringAIAlibaba的Spring Boot与Spring Cloud Alibaba AI对接,实现基本聊天功能。"),new Document("6. SpringAIAlibaba支持文本生成、翻译、摘要等生成式AI功能。"),new Document("7. SpringAIAlibaba支持文本数据的语义搜索和AI绘画功能。"),new Document("8. 使用SpringAIAlibaba的TongYiChatModel和TongYiImagesModel实现聊天和图片服务。"),new Document("9. 在SpringAIAlibaba的REST控制器中提供对外的API接口。"),new Document("10. 通过SpringAIAlibaba的简单API调用实现AI模型的集成。"),new Document("11. 使用SpringAIAlibaba的Prompt模板管理控制AI模型的输出。"),new Document("12. 结合SpringAIAlibaba的检索和生成技术(RAG)提高生成内容的质量。"),new Document("13. 使用SpringAIAlibaba实现文本生成图像和图像识别功能。"),new Document("14. 准备SpringAIAlibaba需要的Java 17及以上的开发环境。"),new Document("15. 使用IDEA进行SpringAIAlibaba的Java开发和HBuilder X进行前端开发。"),new Document("16. 在SpringAIAlibaba的Spring Boot项目中集成多种AI模型和向量数据库。"),new Document("17. SpringAIAlibaba支持自然语言处理、计算机视觉、语音处理和数据分析与预测功能。"),new Document("18. 通过SpringAIAlibaba的配置中心和注册中心实现动态扩展。"));vectorStore.add(documents);logger.info("Vector data initialized");}
}
启动项目后数据就会被存入到 milvus 中。
创建接口
向量搜索
根据用户输入搜索最相似的文本,代码如下:
@GetMapping("/select")
public List<Document> search(String param) {return vectorStore.similaritySearch(SearchRequest.builder().query(param).topK(10).build());
}
其中 topK 代表要搜索的数量。
大模型+Milvus
@GetMapping(value = "/chat")
public Flux<String> generation(@RequestParam("prompt") String userInput,HttpServletResponse response
) {response.setCharacterEncoding("UTF-8");// 发起聊天请求并处理响应return chatClient.prompt().user(userInput)// 大模型使用 milvus 向量库.advisors(new QuestionAnswerAdvisor(vectorStore, SearchRequest.builder().build())).stream().content();
}
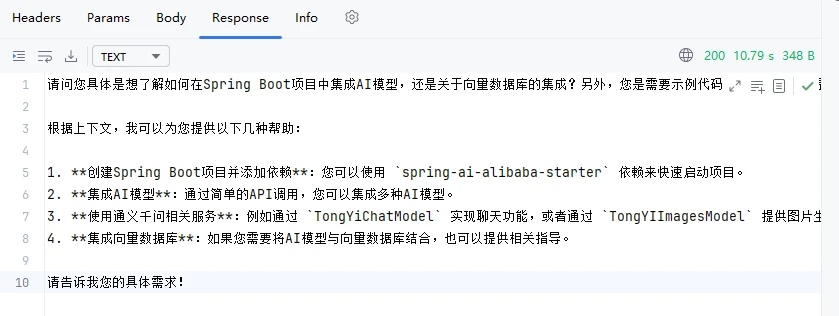
创建了一个 QuestionAnswerAdvisor,使用到了 vectorStore,查看调用效果: