实现目标:
一、设备自启后能够获得服务的ip与端口号,用于计算机连接设备;
二、计算机可以通过服务ip与端口访问设备服务;
三、上传需要处理的数据,返回结果反馈给用户;
四、上传到服务器的数据不会导致设备内存耗尽,自动删除多余的数据;
进阶(未实现):
五、提供用户登陆功能,设备支持唯一damin管理员用户。其他用户可注册;
六、提供登陆界面,用户通过登陆界面输入用户名与密码登录;
七、支持已处理的数据记录在设备数据库当中,提供web页面可查;
八、查询的历史数据支持查看:数据处理时间、处理前上传图片和处理后车牌结果。
使用到的工具与方法
一、systemctl自启服务
二、oled
二、python
三、flask
四、bootstrap框架
五、hyperlpr车牌识别的v1版本
实现过程:
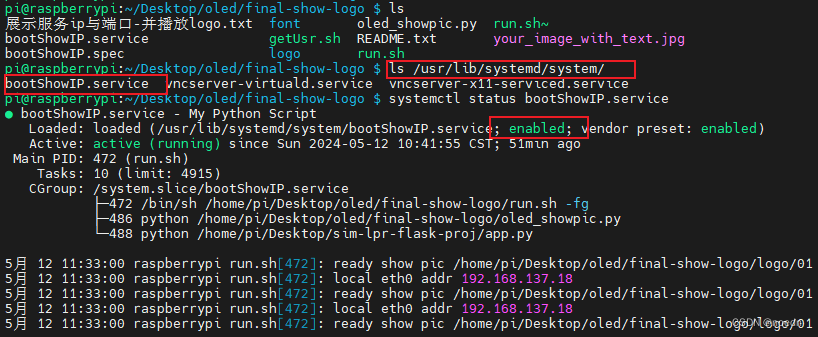
一、配置自启服务,开机显示服务ip与端口
使用systemctl配置开机自启由oled显示ip与端口(在前面另一篇文章)。

二、将基于flask的web程序加入到run.sh执行脚本当中
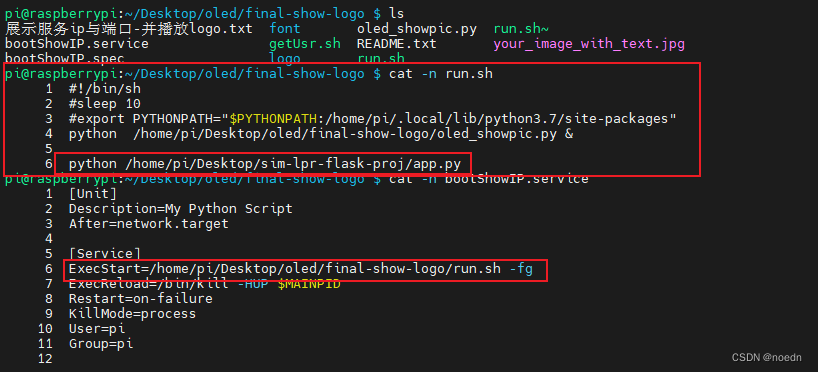
前提是bootShowIP.service文件已经放到/lib/usr/systemd/system目录当中并已启用:
三、在将flask程序部署到树莓派上前,在本地进行了测试。
1、本地可以正常安装使用hyperlpr3,但是在设备上运行时提示由于无法安装onnxruntime导致的无法使用车牌识别功能。
2、无法安装onnxruntime可能是因为onnxruntime没有支持设备的处理器架构的版本。尝试安装hyperlpr v1成功:
python -m pip install -i https://pypi.tuna.tsinghua.edu.cn/simple hyperlpr
#防止下载过慢,使用-i指定下载镜像
3、由于hyperlpr v1版本比较旧,依赖的numpy版本也比较旧,如果直接安装最新的numpy会导致无法使用:
尝试解决:
pip install -i https://pypi.tuna.tsinghua.edu.cn/simple --upgrade --force-reinstall numpy
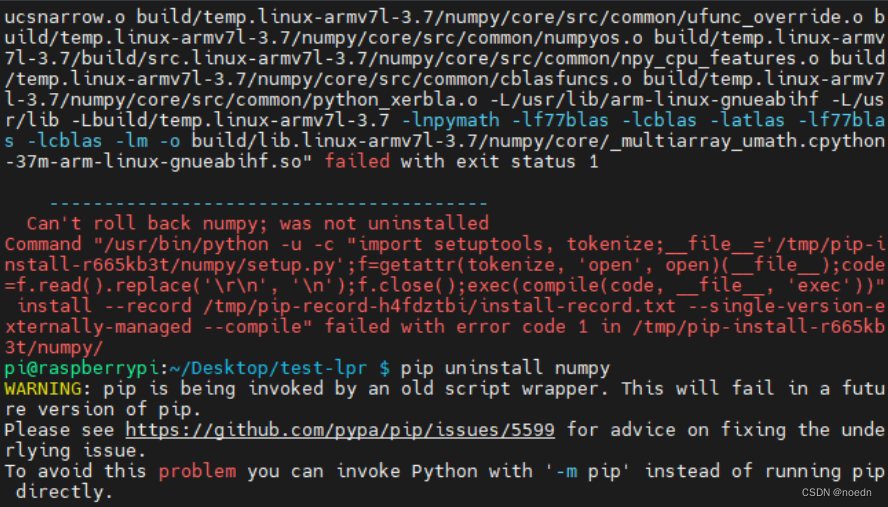
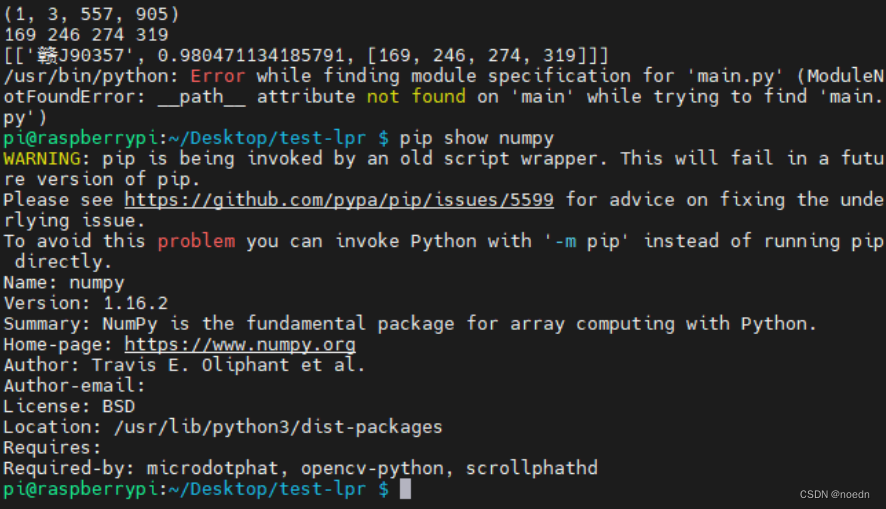
安装失败,按提示“Can't roll back numpy; was not uninstalled”,卸载pip uninstall numpy

卸载之后发现hyperlpr正常了,并且已经存在numpy,可能是安装了多次
四、测试安装的hyperlpr模块正常后,将以hyperlpr作为后端的falsk程序部署到树莓派
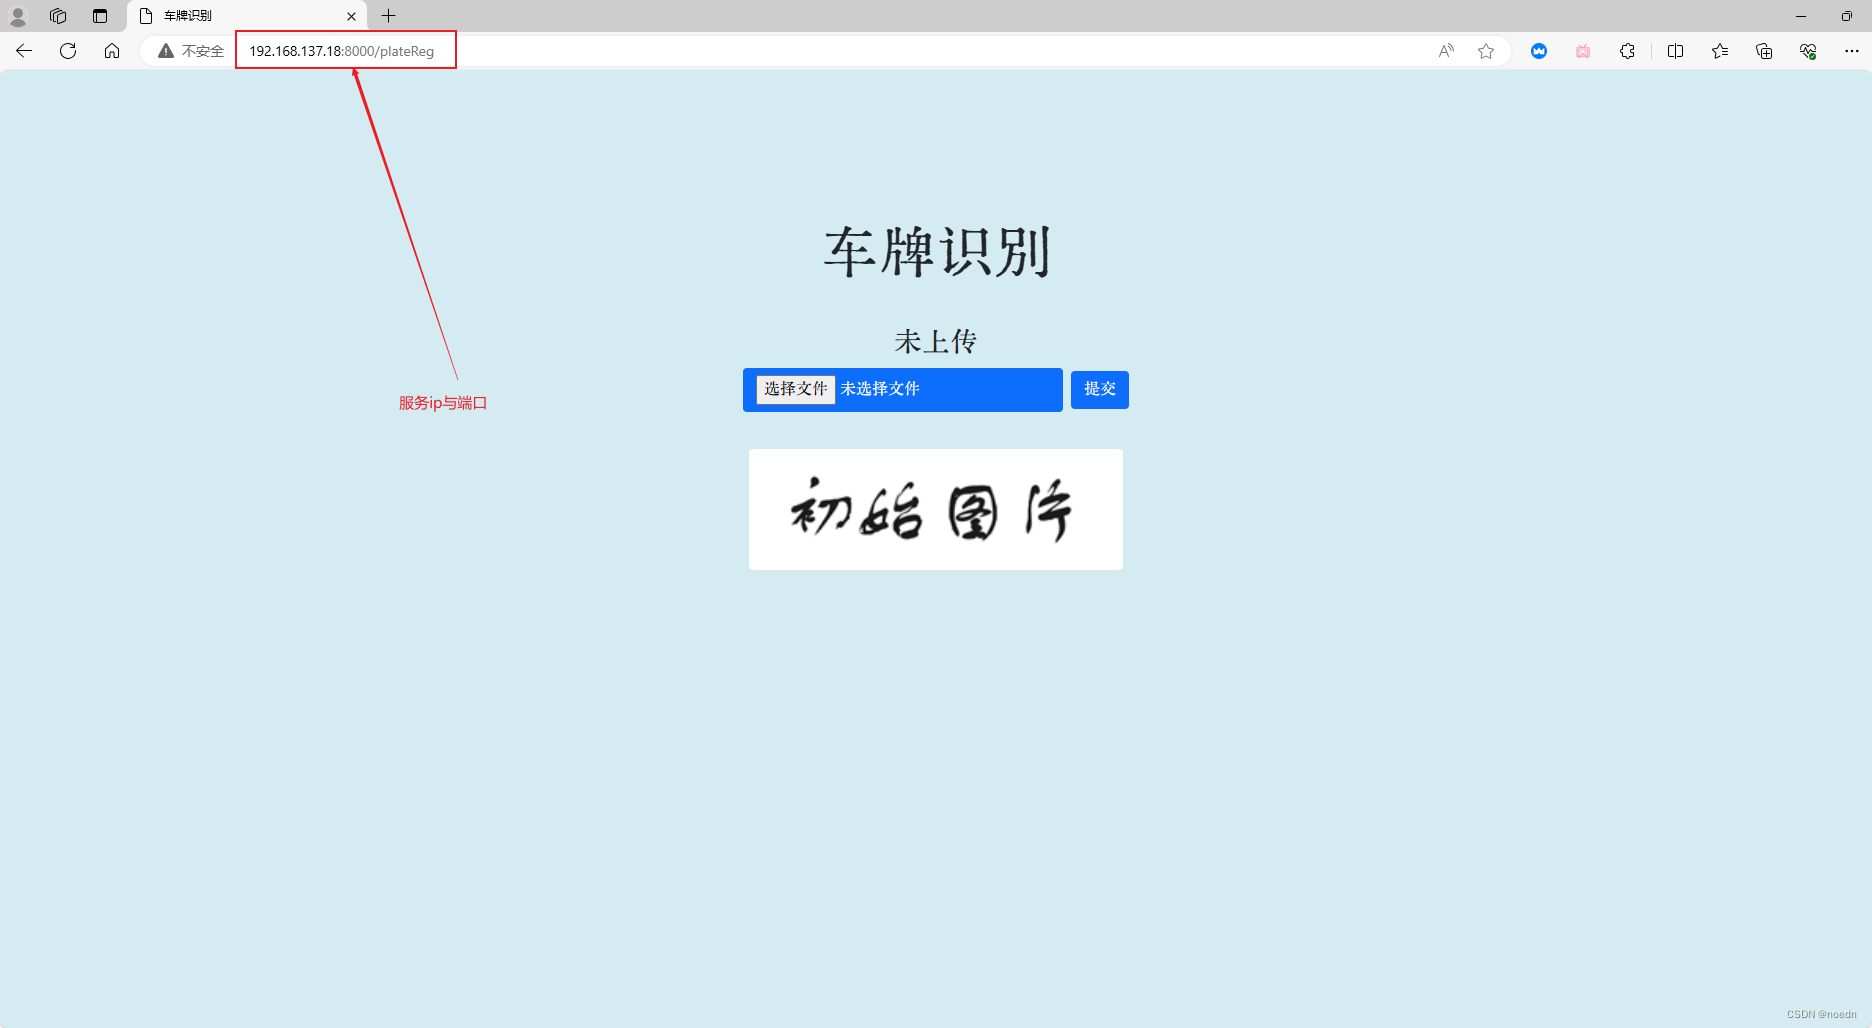
车牌识别系统主页:
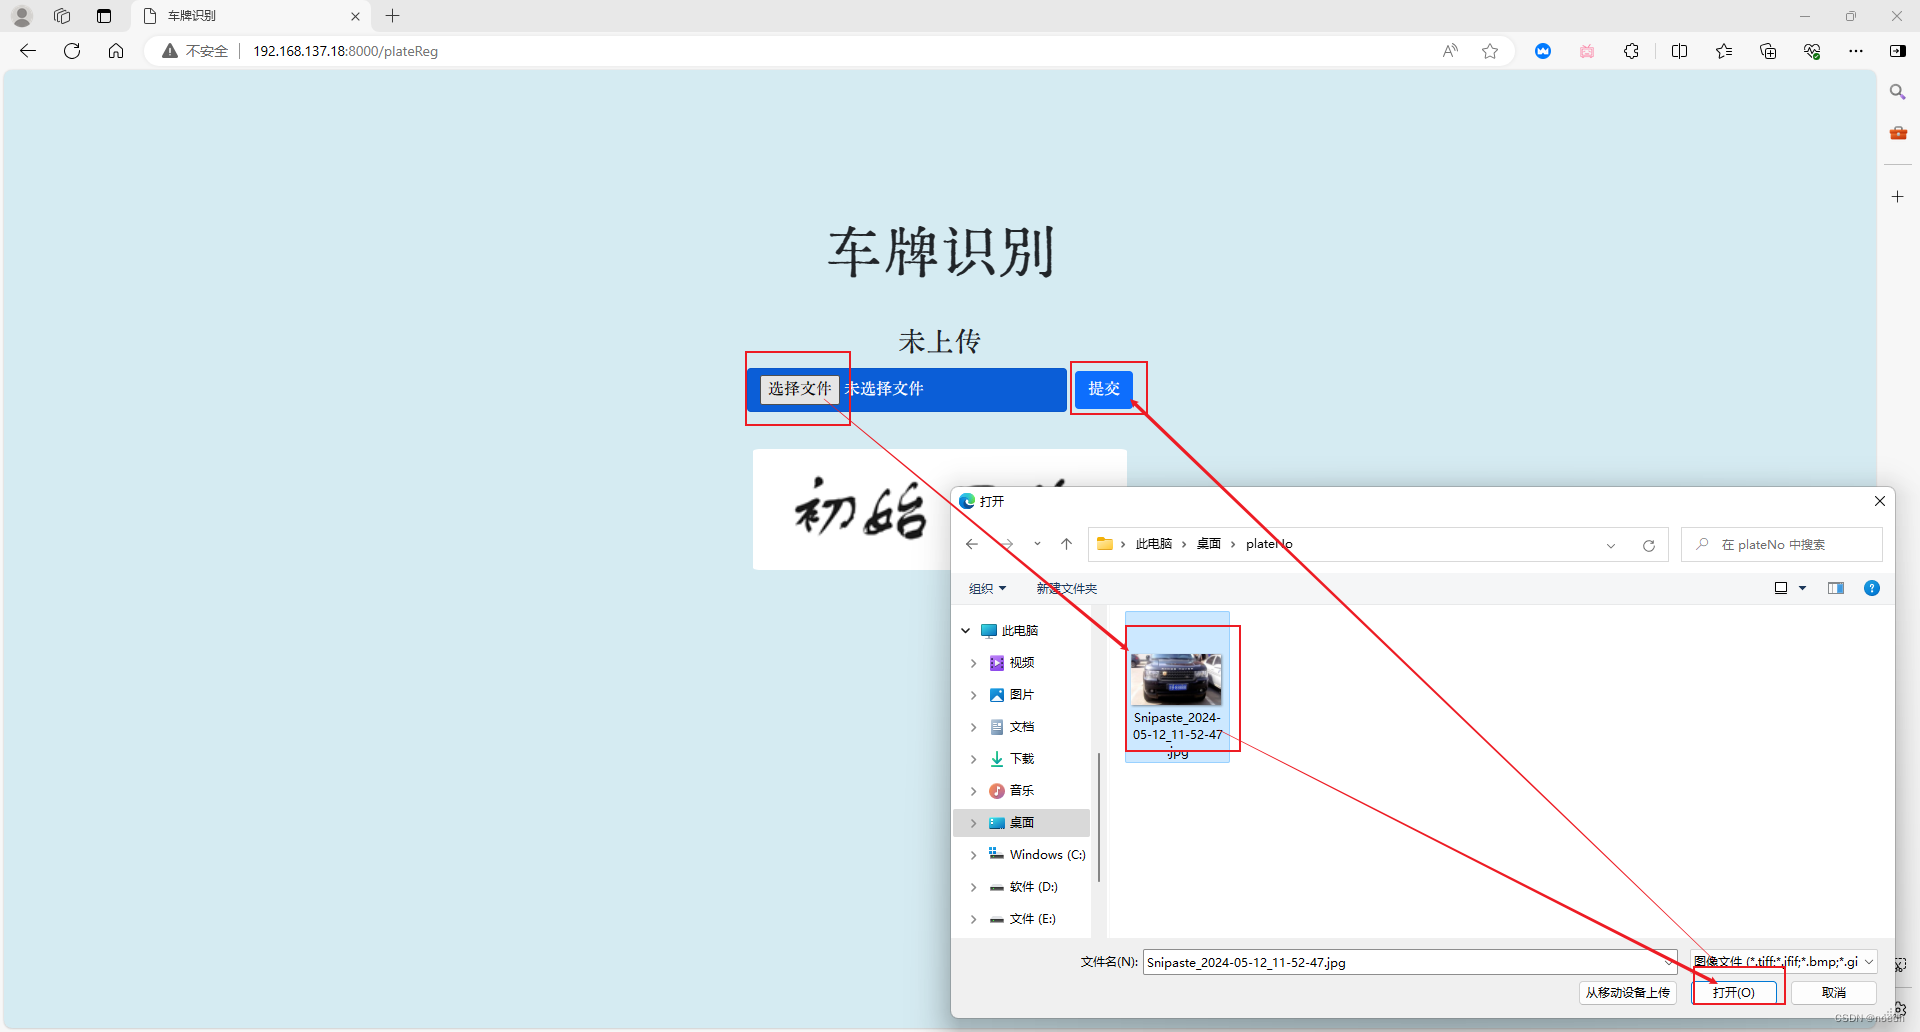
提交待识别车牌:
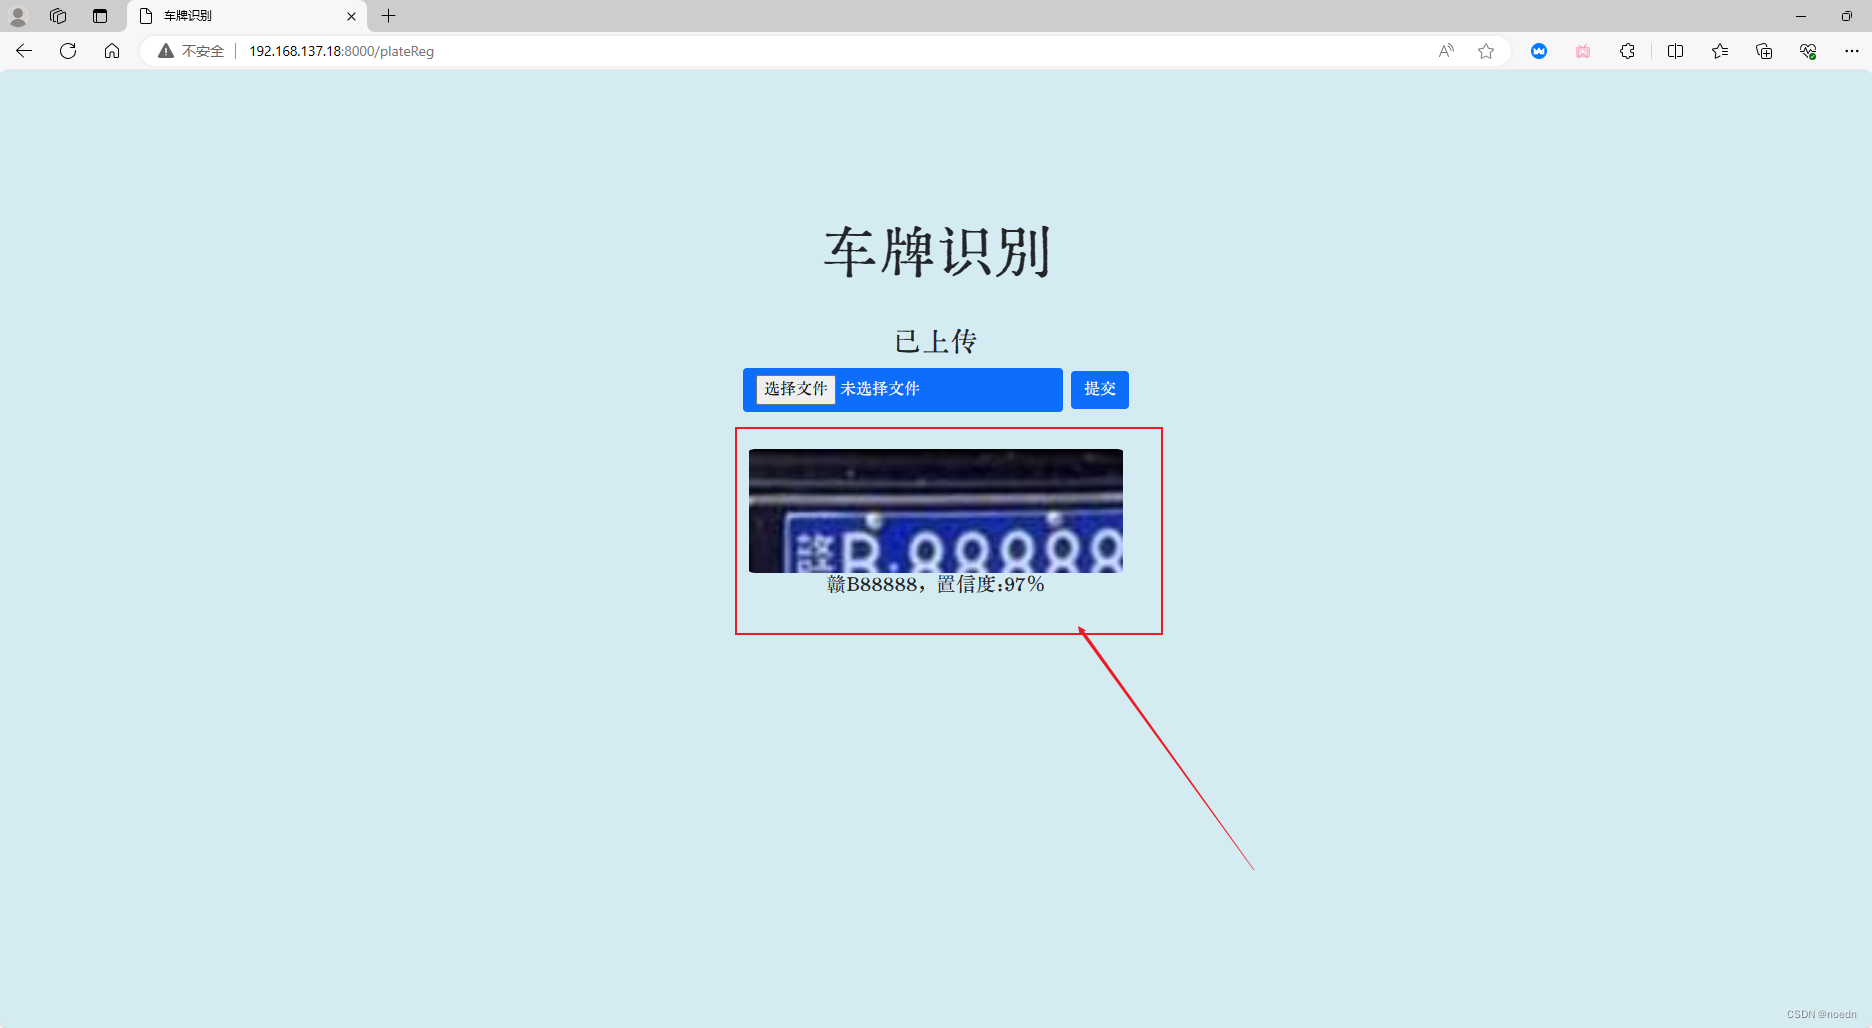
获取车牌识别结果与车牌抠图:
所有源代码
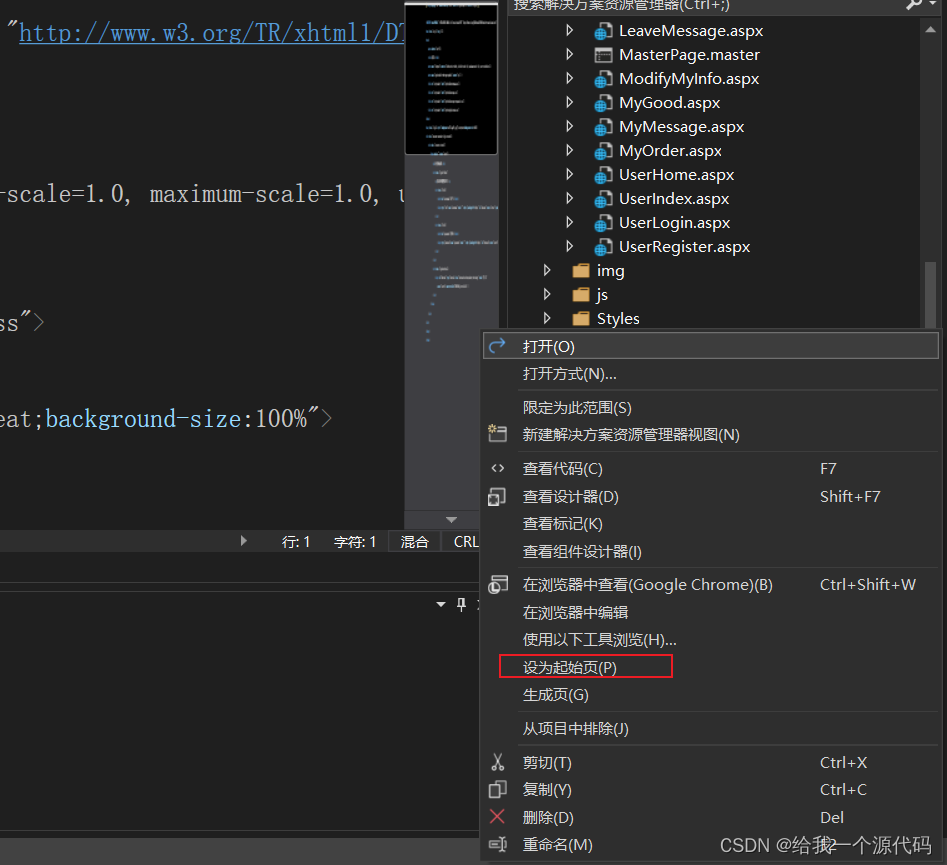
一、项目代码目录结构:
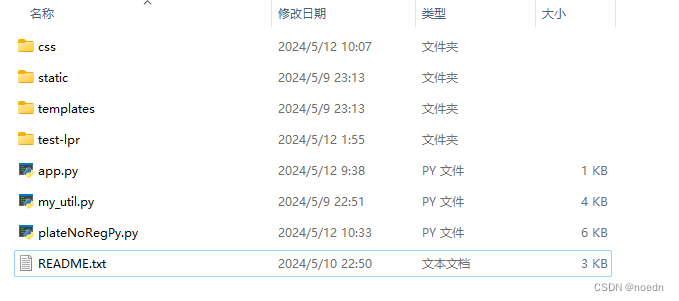
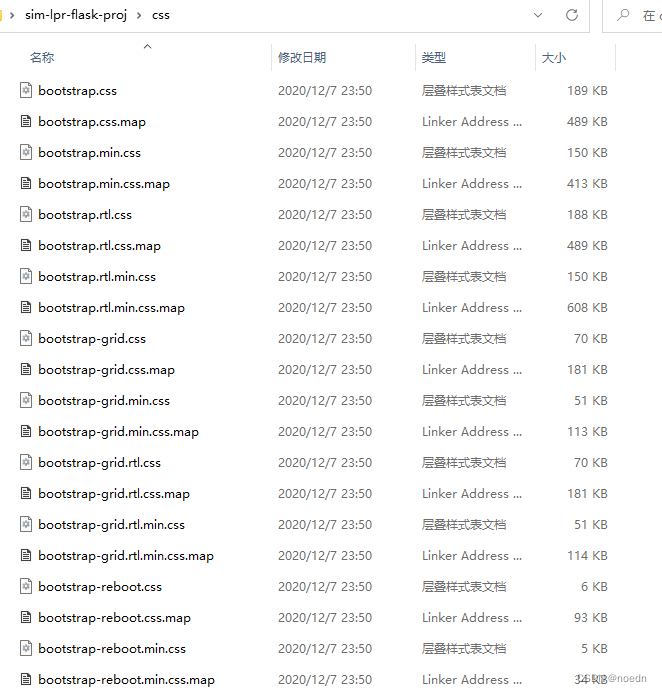
目录文件夹与文件作用说明:
1、css文件夹是boostrap框架的静态文件,用于控制web页面的样式,可以从bootstrap快捷简单的获得美观的表单;
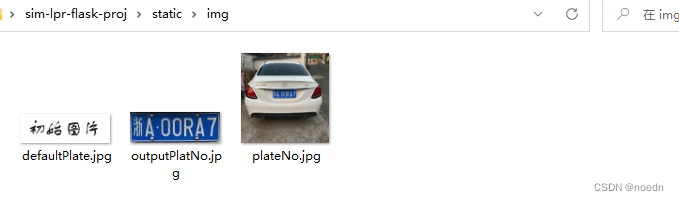
2、static文件夹是字体(目录fonts)、web页面默认展示图片(目录src)、保存用户上传图片和经过处理的图片结果保存目录(目录img);
3、templates文件夹是web页面的html文件保存目录;
4、app.py文件是flask程序的入口函数文件;
5、mu_util.py文件是本人收集实现的一些工具函数文件;
6、plateNoRegPy.py文件是基于hyperlpr的车牌识别处理实现代码文件。
二、hyperlpr模块测试文件夹目录:
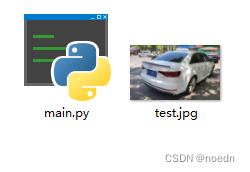
from hyperlpr import *
import cv2if __name__ == '__main__':image = cv2.imread("test.jpg")# 打印识别结果lpr_result = HyperLPR_plate_recognition(image)print("[0]")print(lpr_result[0])result = lpr_result[0]print("plateNo:")print(lpr_result[0][0])print("location:")print("x1{},y1{},x2{},y2{}".format(result[2][0], result[2][1], result[2][2], result[2][3]))
三、css文件中的文件由bootstrap中下载
四、static文件夹
1、fonts文件夹

2、img文件夹,程序第一次使用前为空
3、src文件夹

五、templates文件夹

<!DOCTYPE html>
<html lang="zh-CN">
<head><meta charset="UTF-8"><title>车牌识别</title><link rel="stylesheet" href="/static/css/bootstrap.css"><style>/*static 文件夹是默认用于存放静态文件的,比如 CSS、JavaScript、图片和字体文件等。Flask 会自动为 static 文件夹下的所有文件提供静态文件的路由,使得这些文件可以被直接访问,而不需要你为每个文件单独编写路由。*/@font-face {font-family: 'KingHwa'; /* 自定义字体名称 *//*此处将字体文件加入到static文件夹当中,就省去了编写路由的工作,ttf文件对应路由格式truetype*/src: url('../static/fonts/KingHwa_OldSong.ttf') format('truetype');/* 字体文件路径和格式 */font-weight: normal;font-style: normal;}body {background-color: rgba(173, 216, 230, 0.5); /*设置页面背景颜色*/font-family: "KingHwa", sans-serif; /*设置字体*/}.center-image {/*position: fixed;*/display: block;margin-top: 4%;margin-left: 40%;margin-right: 40%;border-radius: 4%; /* 设置圆角大小 */width: 20%; /* 你可以根据需要调整宽度 */}.center-bnt {/*position: fixed;*/display: block;{#margin-top: 10%;#}margin-top: 5%;margin-left: 45%;margin-right: 45%;width: 10%; /* 你可以根据需要调整宽度 */}.rounded-font {display: block;margin-top: 8%;border-radius: 2%; /* 设置圆角大小 */font-size: 360%; /* 设置字体大小 */text-align: center; /* 将文本居中 */}#backToTop {position: fixed;bottom: 20px;right: 30px;z-index: 99;border: none;outline: 1px solid black;/*设置轮廓*/background-color: rgba(0, 0, 230, 0.5);color: white;cursor: pointer;padding: 4px 5px;border-radius: 2px;/*设置圆角*/}.default-img {/*position: fixed;*/display: block;{#margin-top: 10%;#}{#margin-top: 5%;#}margin-left: 30%;margin-right: 30%;width: 20%; /* 你可以根据需要调整宽度 */border-radius: 2%;/*设置圆角*/}.back-home {position: fixed;bottom: 15px; /* 初始时,将元素移出视口 */right: 100px;/* 其他样式 */}</style>
</head>
<h1 class="rounded-font">车牌识别</h1>
<body>
{#    <form style="width:100%;margin:2% auto;" method="post">#}
{#      <button type="submit"  class="btn btn-primary center-bnt" style="font-size: 150%">提交图片文件</button>#}
{#    </form>#}<center><div class="body-container"><div class="jumbotron"><form style="width:100%;margin:2% auto;" method="post" enctype = "multipart/form-data"><h3> {{ data.success }} </h3><input class = "btn btn-primary" type="file" name="image" accept="image/*"><input class = "btn btn-primary" type="submit"></form><img src="static/img/{{ name }}" alt="{{ name }}" class="default-img">{% for d in data.predictions %}<h5> {{ d.label}}, 置信度:{{d.probability }}% </h5>{% endfor %}</div></div></center>
{#    <a href="{{ url_for('process_plateReg')}}" class="back-home">返回首页</a>#}
{#  <button onclick="topFunction()" id="backToTop" title="回到顶部">#}
{#    <img src="{{ url_for('send_image', path='src/toTop.jpg') }}" alt="返回顶部">#}
{#  </button>#}<script>function topFunction() {window.scrollTo(0, 0);}</script>
</body>
</html>
六、app.py
from flask import Flask,render_template,request,redirect,send_file
import os
import plateNoRegPyapp = Flask(__name__)# 设置配置
UPLOAD_FOLDER = os.path.join(app.root_path, 'static', 'img')
app.config['UPLOAD_FOLDER'] = UPLOAD_FOLDER
SOURCE_FOLDER = os.path.join(app.root_path, 'static', 'src')
app.config['SOURCE_FOLDER'] = SOURCE_FOLDER
# 注册路由和其他配置
app.register_blueprint(plateNoRegPy.blueprint)  # 车牌图片识别蓝图注册@app.route('/src/<path:path>')#网页的所有文件都是来自服务器
def send_image(path):return send_file(path, mimetype='image/jpeg')@app.route('/')
def hello_world():  # put application's code herereturn redirect('/plateReg')#跳转车牌识别return 'Hello World!'if __name__ == '__main__':# app.run()app.run(host='0.0.0.0', port=8000)#服务访问ip与端口
七、plateNoRegPy.py
# 功能实现模型来源
# hyperlpr3在树莓派上可能无法安装 https://github.com/szad670401/HyperLPR?tab=readme-ov-file
# https://github.com/szad670401/HyperLPR/tree/v1
import cv2
# import hyperlpr3 as lpr3
from hyperlpr import *
from PIL import Image
from flask import request, url_for, render_template, redirect, Blueprint, current_app
from my_util import Logger, copy_file, delete_files
import os
import random# initialize our Flask application and the lpr object
blueprint = Blueprint('processPlatNoImg', __name__)lprObject = None
loger = Logger()
default_pic_name = "defaultPlate.jpg"def init_default_source():# 删除多余的图片max_files_allowed = 30 #后续拷贝一个默认图片,加上上传图片,实际文件夹当中有32个文件delete_files(current_app.config['UPLOAD_FOLDER'], max_files_allowed)# 默认图片拷贝source_path = os.path.join(current_app.config['SOURCE_FOLDER'], default_pic_name)dest_path = os.path.join(current_app.config['UPLOAD_FOLDER'], default_pic_name)if not os.path.exists(dest_path) or not os.path.isfile(dest_path):copy_file(source_path, dest_path)# Instantiate object
def load_object():# 默认图片拷贝source_path = os.path.join(current_app.config['SOURCE_FOLDER'], default_pic_name)dest_path = os.path.join(current_app.config['UPLOAD_FOLDER'], default_pic_name)copy_file(source_path, dest_path)global lprObjectlprObject = HyperLPR_plate_recognition'''
def load_object3():# 默认图片拷贝source_path = os.path.join(current_app.config['SOURCE_FOLDER'], default_pic_name)dest_path = os.path.join(current_app.config['UPLOAD_FOLDER'], default_pic_name)copy_file(source_path, dest_path)global lprObjectlprObject = lpr3.LicensePlateCatcher()
'''def prepare_image(image):loger.debug("Preparing image"+image)image = cv2.imread(image)return imagedef crop_image(image1, image2, x1, y1, x2, y2):# 打开图片img = Image.open(image1)# 截取图片,参数为左上角和右下角的坐标cropped_img = img.crop((x1, y1, x2, y2))# 保存截取的图片cropped_img.save(image2)loger.debug("recognize plateNo: " + image2)@blueprint.route('/plateReg', methods=['GET', 'POST'])  # 访问的路径
def process_plateReg():init_default_source()data = {"success": "未上传"}title = "Upload an image"name = default_pic_nameif request.method == "POST":if request.files.get("image"):image1 = request.files["image"]imagePath = os.path.join(current_app.config['UPLOAD_FOLDER'], image1.filename)image = image1.save(imagePath)loger.debug("接受车牌图片路径"+imagePath)processed_image = prepare_image(imagePath)data["predictions"] = []'''try:if lprObject == None:load_object3()loger.info("lpr object not initialzed")lpr3_results = lprObject(processed_image)except Exception as e:print("Exception  load hyperlpr3", e)'''try:if lprObject == None:load_object()loger.info("lpr object not initialzed")lpr_results = lprObject(processed_image)except Exception as e:print("Exception load hyperlpr", e)lpr_results = ""if len(lpr_results):print("lpr_results:")print(lpr_results[0])result = lpr_results[0]# image2Name = "outputPlatNo"image2Name = result[0] + ".jpg"image2 = os.path.join(current_app.config['UPLOAD_FOLDER'], image2Name)crop_image(imagePath, image2, result[2][0], result[2][1], result[2][2], result[2][3])r = {"label": result[0], "probability": int(100*result[1])}else:image2Name = image1.filenamer = {"label": "unkonw", "probability": int(0)}data["predictions"].append(r)# indicate that the request was a successdata["success"] = "已上传"title = "predict"return render_template('plateNoReg.html', data=data, title=title, name=image2Name)return render_template('plateNoReg.html', data=data, title=title, name=name)
八、my_util.py
import os
import sys
import time
import shutil
import logging
import time
from datetime import datetime#进度条
def print_progress_bar(iteration, total, prefix='', suffix='', decimals=1, length=100, fill='█', print_end="\r"):"""调用在Python终端中打印自定义进度条的函数iteration - 当前迭代(Int)total - 总迭代(Int)prefix - 前缀字符串(Str)suffix - 后缀字符串(Str)decimals - 正数的小数位数(Int)length - 进度条的长度(Int)fill - 进度条填充字符(Str)print_end - 行尾字符(Str)"""percent = ("{0:." + str(decimals) + "f}").format(100 * (iteration / float(total)))filled_length = int(length * iteration // total)bar = fill * filled_length + '-' * (length - filled_length)print(f'\r{prefix} |{bar}| {percent}% {suffix}', end=print_end)# 打印新行,完成进度条if iteration == total:print()class Logger(object):"""终端打印不同颜色的日志"""ch = logging.StreamHandler()  # 创建日志处理器对象,在__init__外创建,是类当中的静态属性,不是__init__中的实例属性# #创建静态的日志处理器可以减少内存消耗# # 创建 FileHandler 实例,指定日志文件路径# ch = logging.FileHandler(filename='app1.log')def __init__(self):self.logger = logging.getLogger()  # 创建日志记录对象self.logger.setLevel(logging.DEBUG)  # 设置日志等级info,其他低于此等级的不打印def debug(self, message):self.fontColor('\033[0;37m%s\033[0m')self.logger.debug(message)def info(self, message):self.fontColor('\033[0;32m%s\033[0m')self.logger.info(message)def warning(self, message):self.fontColor('\033[0;33m%s\033[0m')self.logger.warning(message)def error(self, message):self.fontColor('\033[0;31m%s\033[0m')self.logger.error(message)def fontColor(self, color):formatter = logging.Formatter(color % '%(asctime)s - %(name)s - %(levelname)s - %(message)s')  # 控制日志输出颜色self.ch.setFormatter(formatter)self.logger.addHandler(self.ch)  # 向日志记录对象中加入日志处理器对象def delete_files(folder_path, max_files):"""监控指定文件夹中的文件数量,并在超过max_files时删除最旧的文件。"""print("进入删除图片文件夹"+folder_path)print("需要删除文件数量")print(max_files)if True:# 获取文件夹中的文件列表files = os.listdir(folder_path)file_count = len(files)print(f"当前文件夹 {folder_path} 中的文件数量: {file_count}")# 如果文件数量超过max_files,则删除最旧的文件if file_count > max_files:# 获取文件夹中所有文件的完整路径,并带上修改时间file_paths_with_mtime = [(os.path.join(folder_path, f), os.path.getmtime(os.path.join(folder_path, f))) forf in files]# 按修改时间排序sorted_files = sorted(file_paths_with_mtime, key=lambda x: x[1])# 删除最旧的文件,直到文件数量在阈值以下for file_path, mtime in sorted_files[:file_count - max_files]:try:os.remove(file_path)print(f"已删除文件: {file_path}")except OSError as e:print(f"删除文件时出错: {e.strerror}")def copy_file(src, dst):shutil.copy2(src, dst)  # copy2会尝试保留文件的元数据
整体实现效果
[稍后上传]