IDEA专业版 Springboot连接MySQL保姆级教程 2025

上面是前后端合作完成一个项目的大致流程
可以看出用Springboot 连接数据库还是很重要的
IDEA中springboot连接mysql
先建立一个springboot项目,idea点新建项目,选择springboot即可
作者刚生成就有一处报错
找不到插件 'org.springframework.boot:spring-boot-maven-plugin:3.4.5'
解决方法
1.找到pom.xml

2.在里面写入(反正我的idea没有,所以我自己补上的)
<dependency><groupId>org.springframework.boot</groupId><artifactId>spring-boot-maven-plugin</artifactId><version>3.4.5</version>
</dependency>
作者还遇到了一个报错
在src/main/ 找到Plan1Application,将里面的内容改为
package com.example.plan1;import org.springframework.boot.SpringApplication;
import org.springframework.boot.autoconfigure.SpringBootApplication;@SpringBootApplication
public class Plan1Application {public static void main(String[] args) {SpringApplication.run(Plan1Application.class, args);}}
巧了,作者还有一个报错
2025-04-29T22:12:50.534+08:00 ERROR 1412 --- [plan1] [ restartedMain] o.h.engine.jdbc.spi.SqlExceptionHelper : Public Key Retrieval is not allowed
解决方法
找到如图上面的地方,点进去
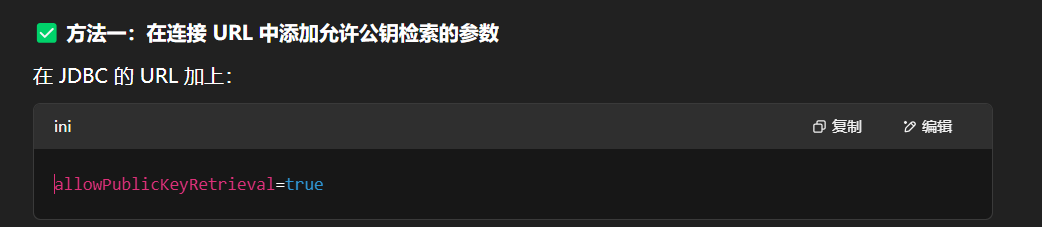
其实就是把原有的其中一行代码改成如下内容:
spring.datasource.url=jdbc:mysql://localhost:3306/your_db?useSSL=false&allowPublicKeyRetrieval=true&serverTimezone=UTC
OK,让我们下面继续吧
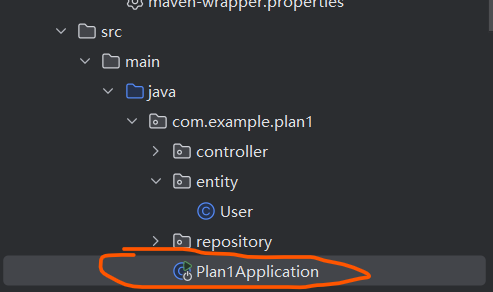
注意路径不要找错
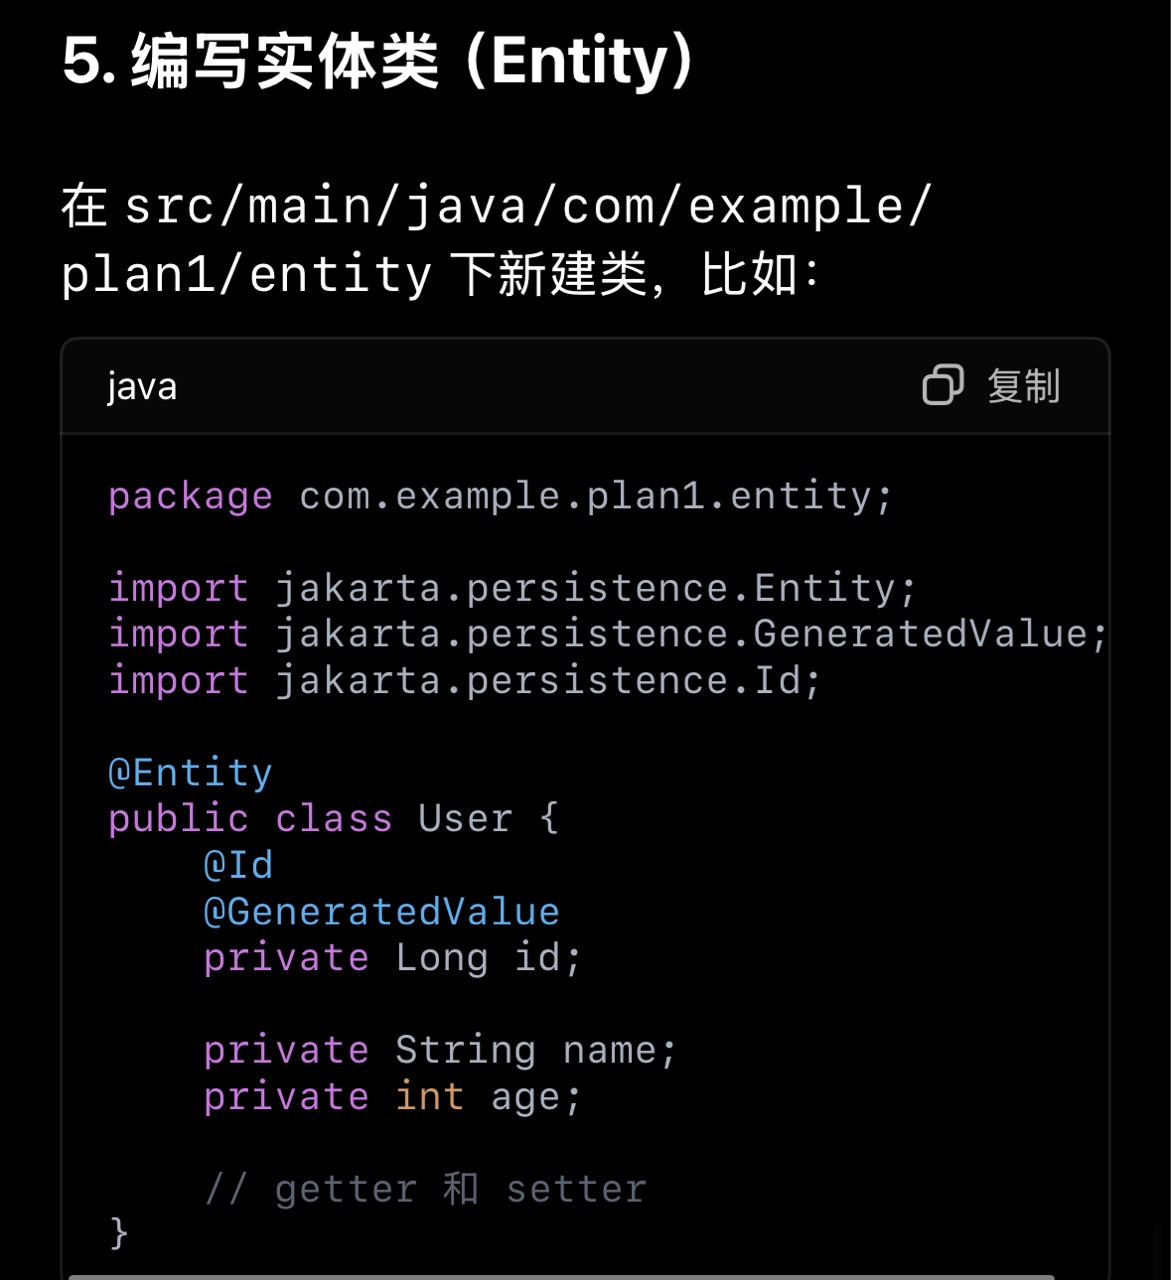
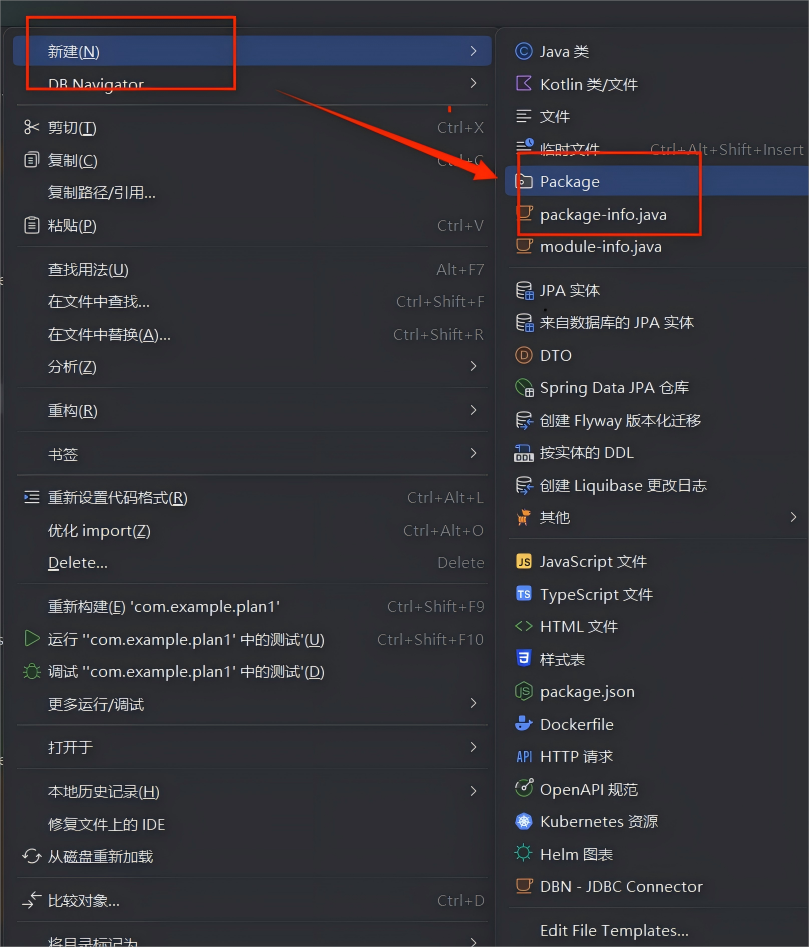
一般实体类系统不会默认生成,需要自己创建
一般是在src/main/java/example/自己文件名 下建立entity
entity的类型是Package
建立过程如图
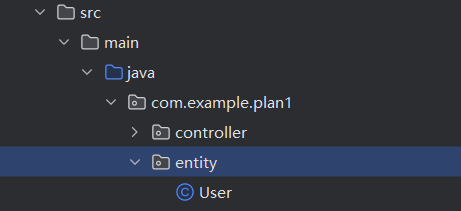
建立好后如图:
新建的User类就是Java类.
新建类中的代码:package com.example.plan1.entity;import jakarta.persistence.Entity;
import jakarta.persistence.GeneratedValue;
import jakarta.persistence.Id;@Entity
public class User {@Id@GeneratedValueprivate Long id;private String name;private int age;// getter 和 setter
}
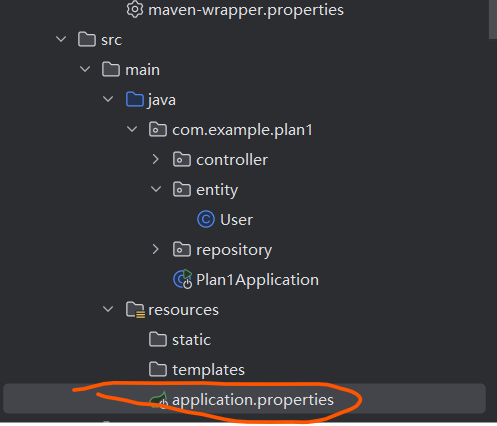
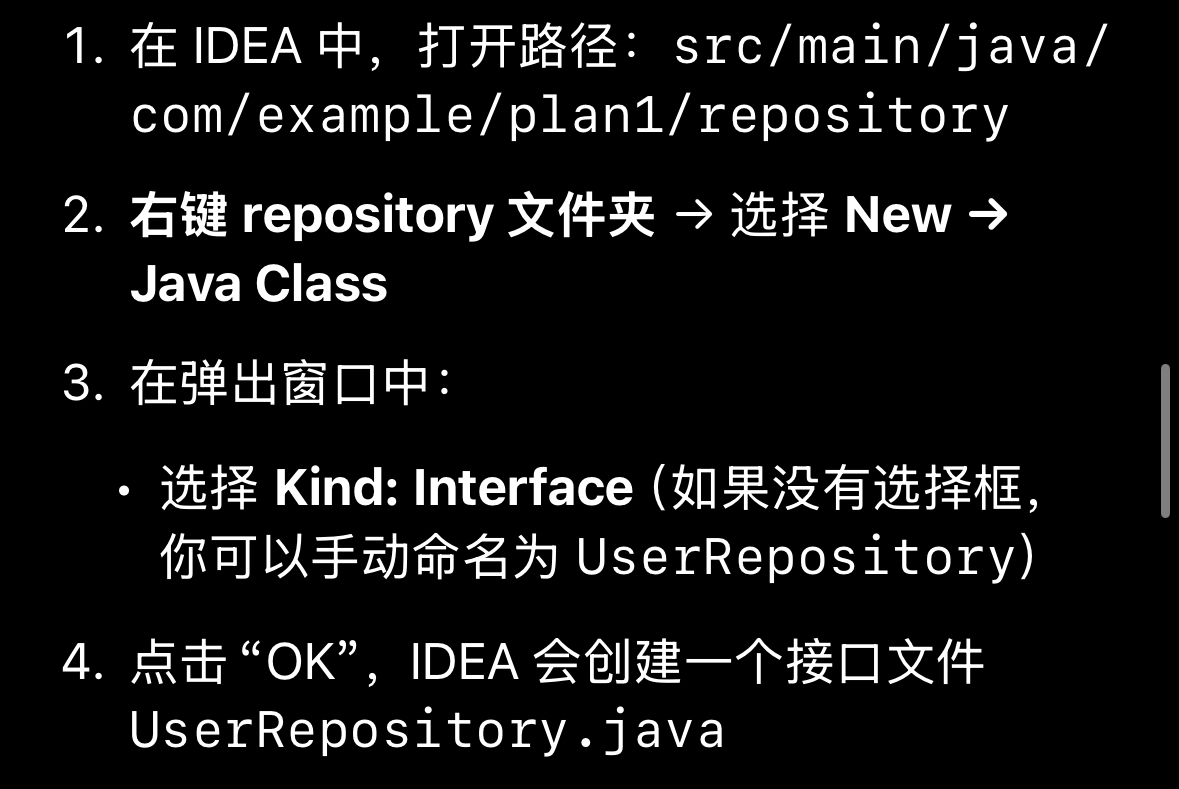
同理,系统一般不会自己生成
先手动模仿上述的entity,生成一个Package 名为repository
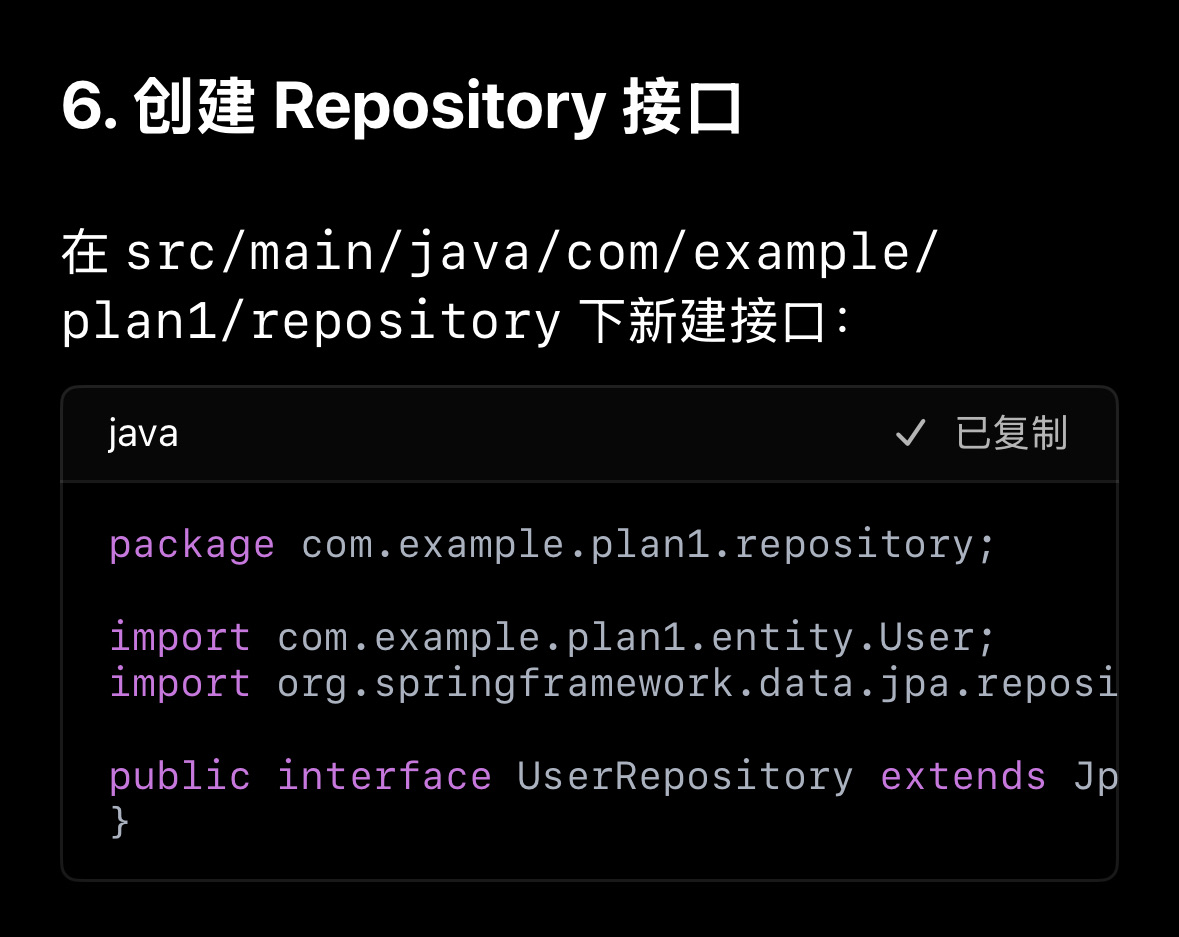
下面是创建接口
图中代码package com.example.plan1.repository;import com.example.plan1.entity.User;
import org.springframework.data.jpa.repository.JpaRepository;public interface UserRepository extends JpaRepository<User, Long> {
}
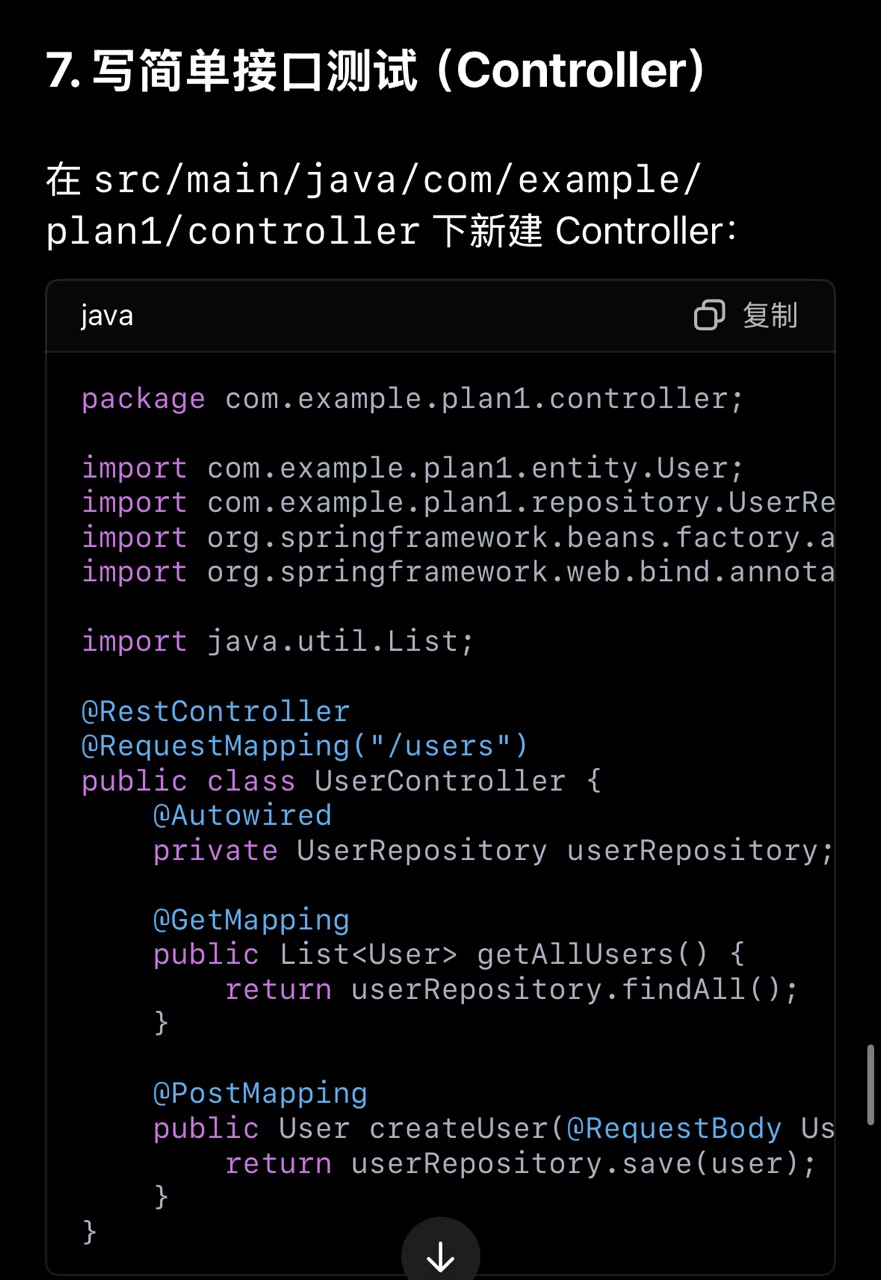
图中代码package com.example.plan1.controller;import com.example.plan1.entity.User;
import com.example.plan1.repository.UserRepository;
import org.springframework.beans.factory.annotation.Autowired;
import org.springframework.web.bind.annotation.*;import java.util.List;@RestController
@RequestMapping("/users")
public class UserController {@Autowiredprivate UserRepository userRepository;@GetMappingpublic List<User> getAllUsers() {return userRepository.findAll();}@PostMappingpublic User createUser(@RequestBody User user) {return userRepository.save(user);}
}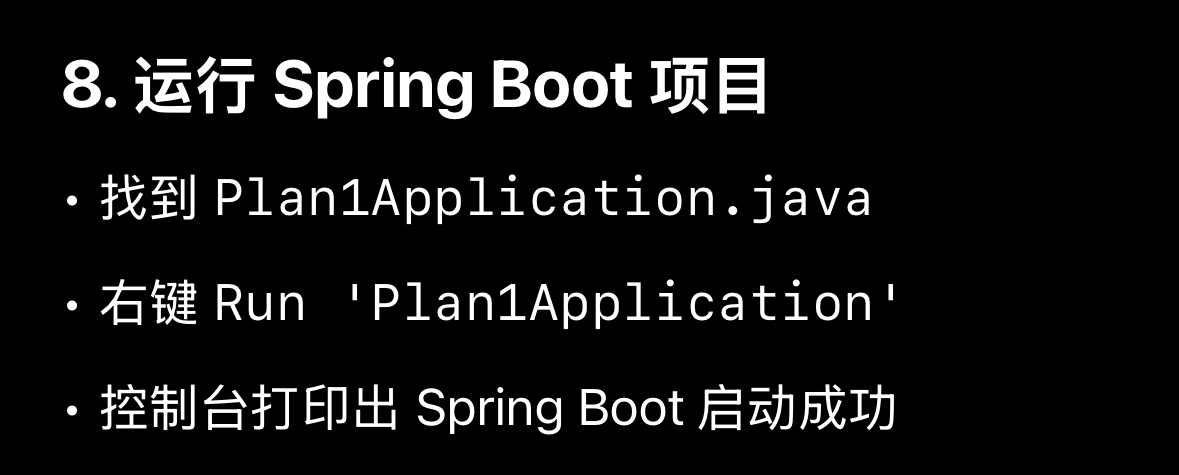
另一种验证是否springboot是否启动成功
先看控制台是否出现error,不是error就没事
例如

上面两种情况都不影响启动(即不是error就行)
然后再看是否出现下面两个东西,出现了基本就成功了
有点小了baby,但我懒得改了

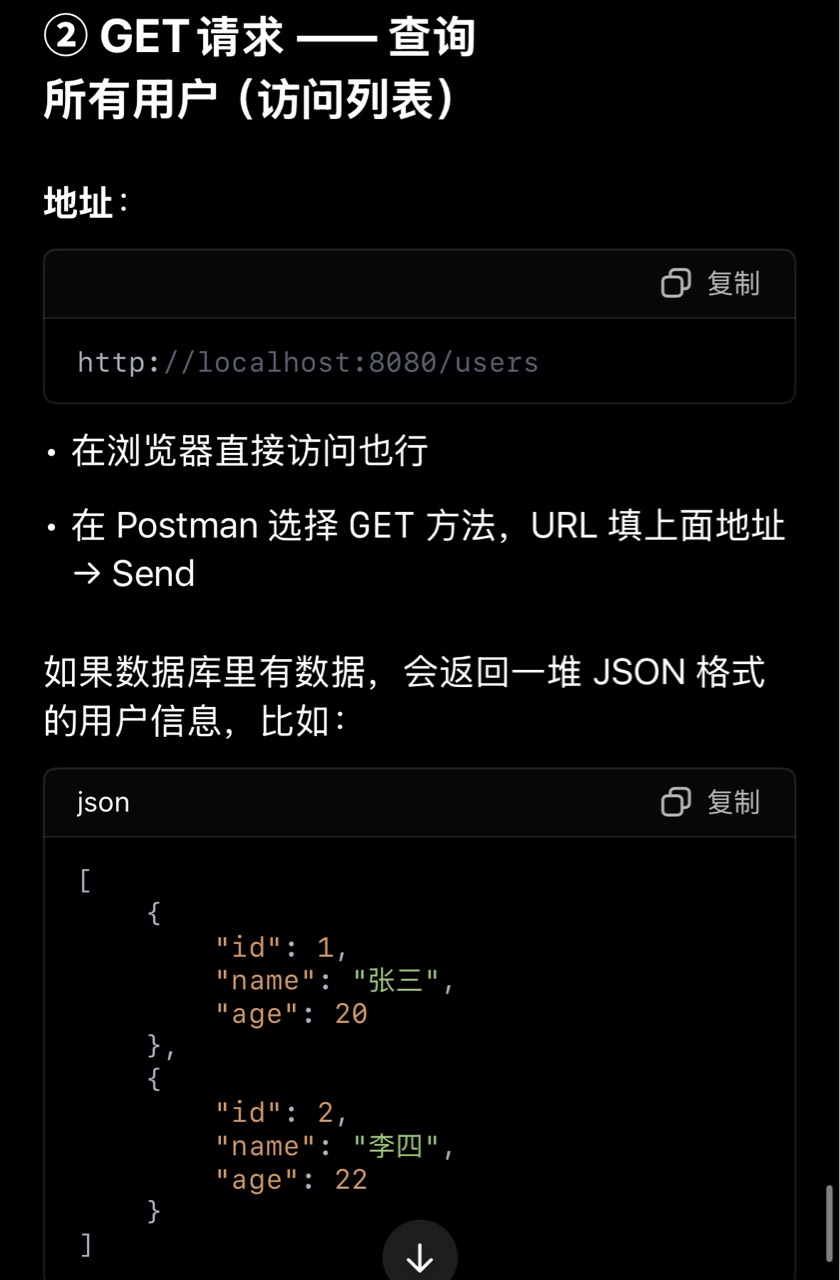
输入http://localhost:8080/users,打开后没有404,而应该包含下图中的内容
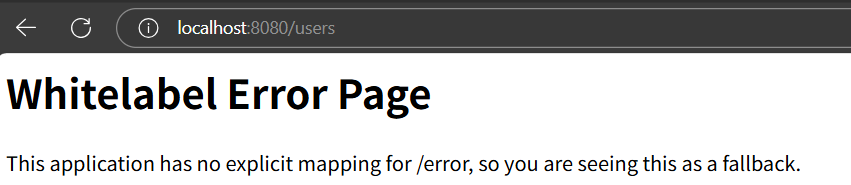
如果出现上图中的内容,恭喜你成功了!
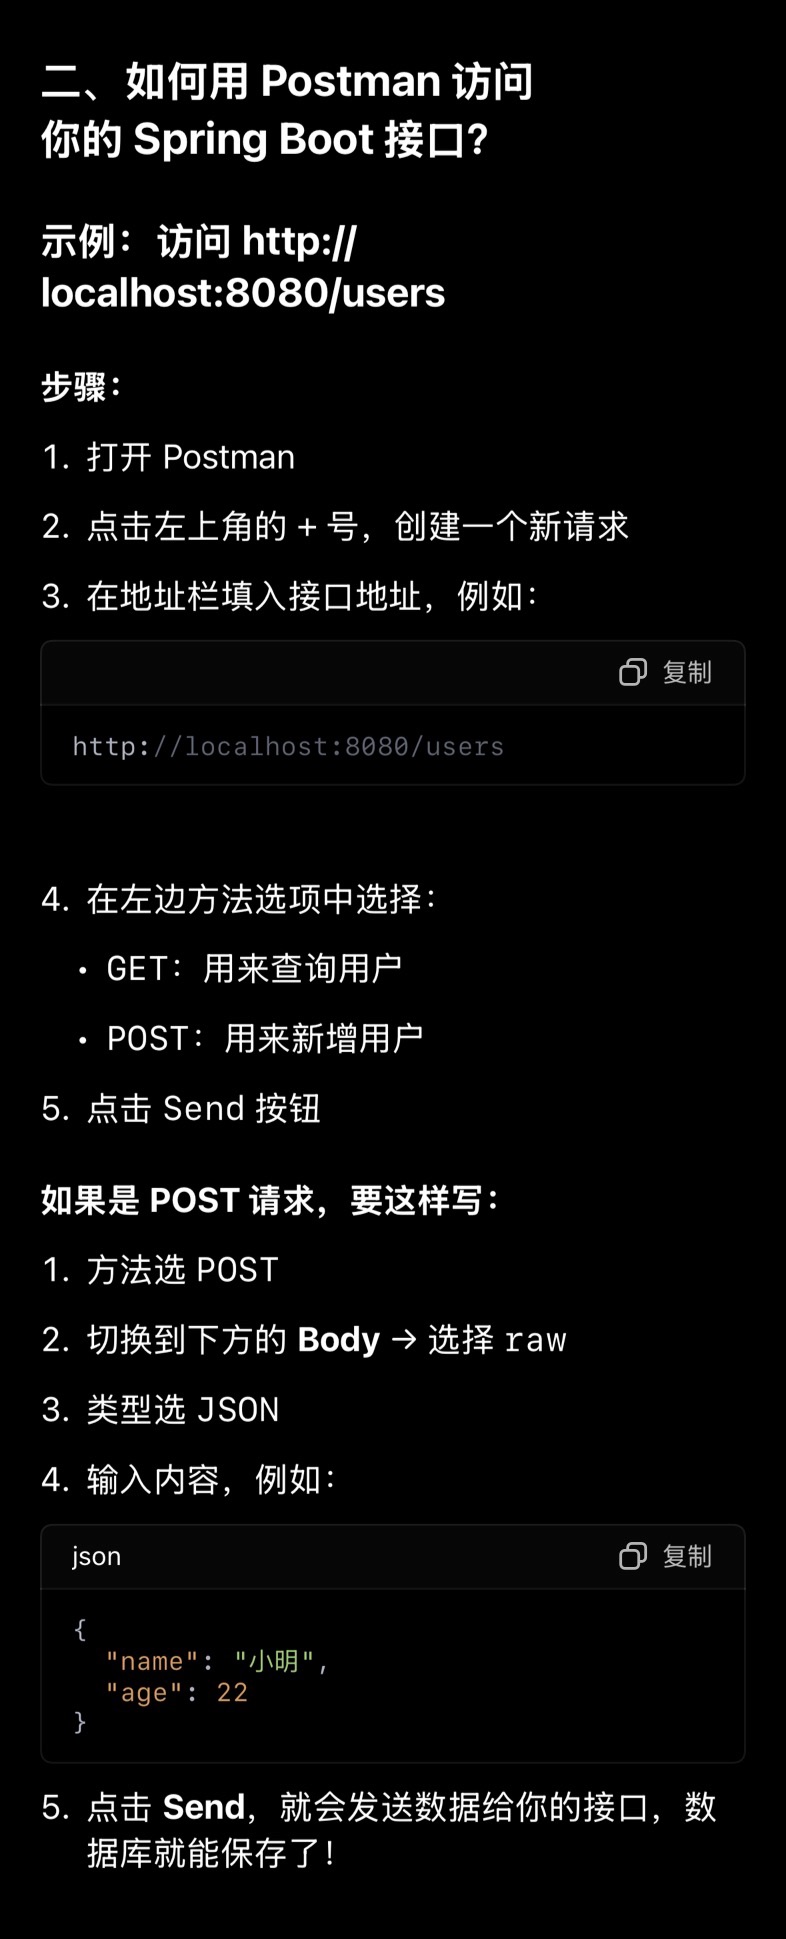
访问接口测试
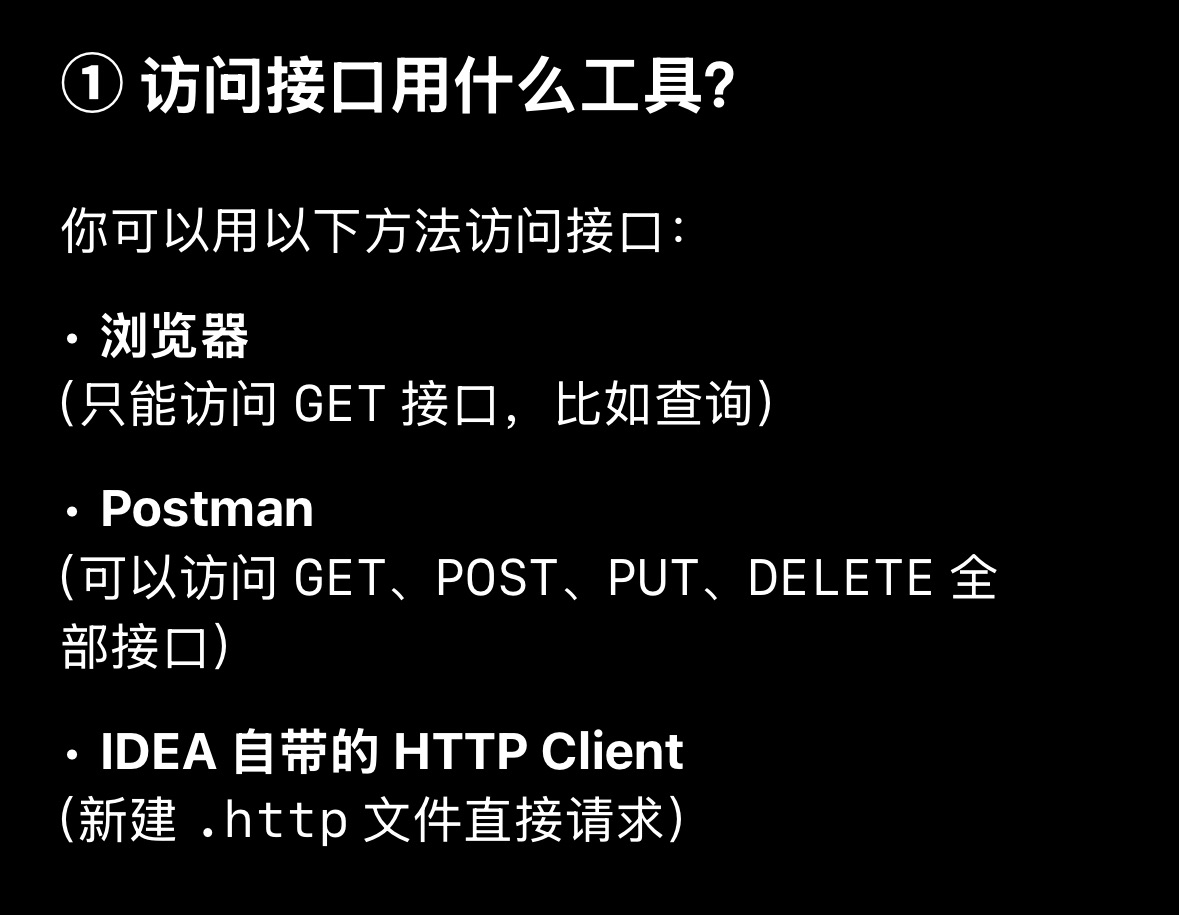
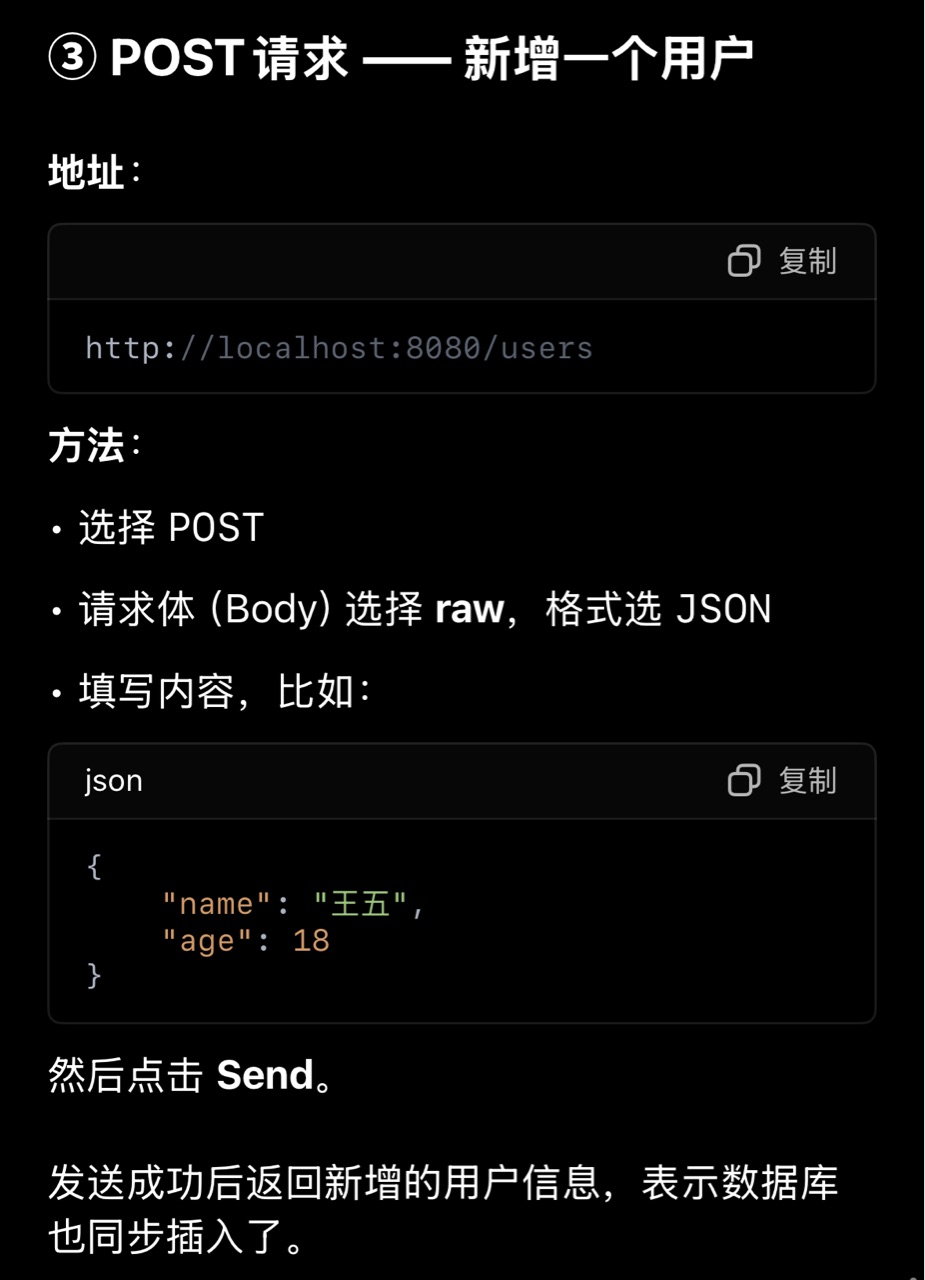
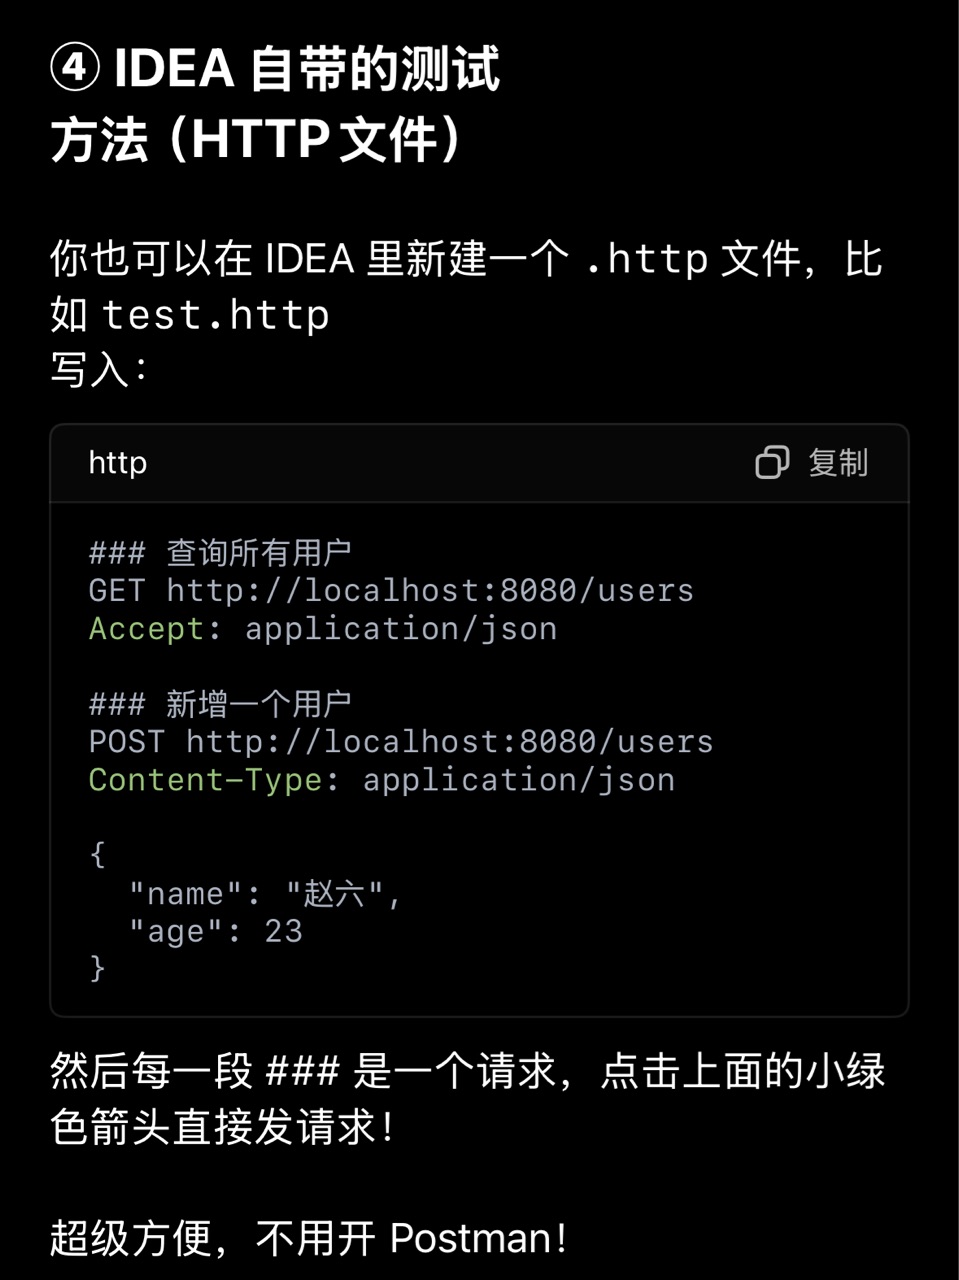
注意,使用idea可以不用postman,不要给自己找麻烦,除非你比较专业(或者追求极致)
postman介绍及使用
什么是 Postman?
Postman 是一个非常流行的 API 接口测试工具。
你可以用它来:
访问、测试你的 Spring Boot 接口
发送 GET / POST / PUT / DELETE 请求
查看接口响应结果
不需要写前端、不需要浏览器,一切操作都可视化
为什么开发者常用 Postman?
作用:
可以测试接口是否写得对
模拟前端传来的数据
可以保存、复用接口请求
方便调试、返回信息清晰
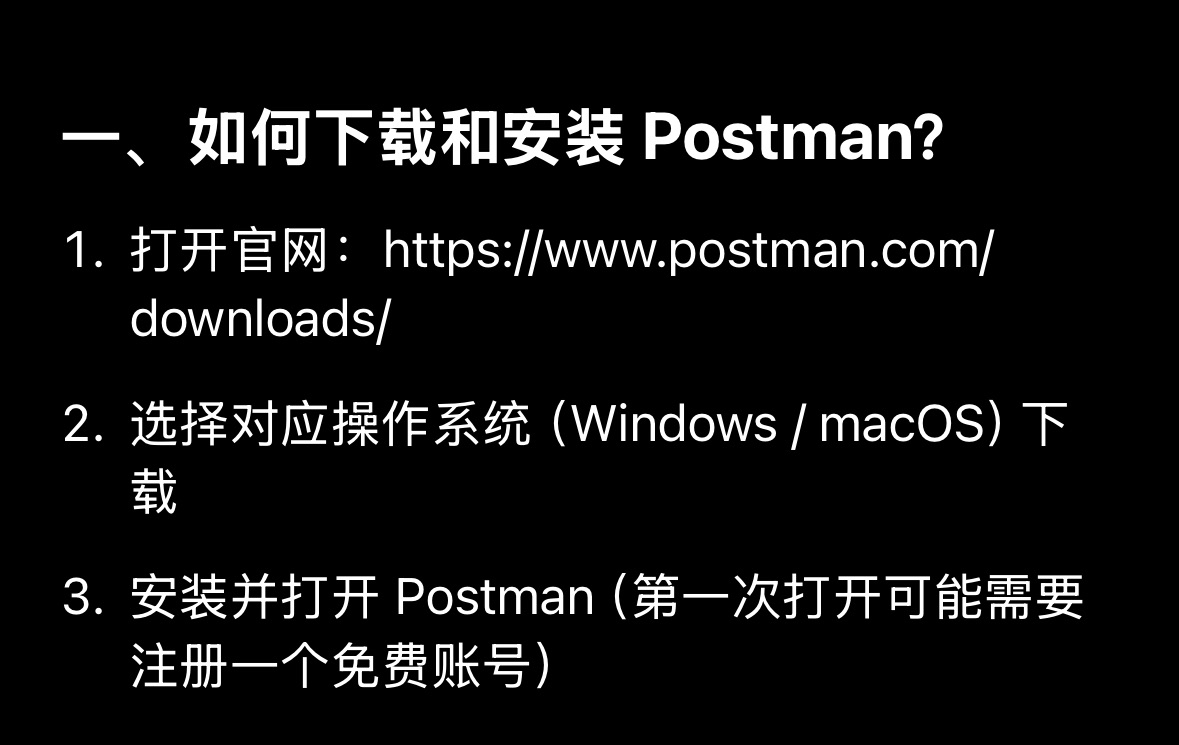
postman下载,时间久远作者不清楚能不能用
全文总结:
作者springboot,mysql的初体验
尝试在idea中把springboot与mysql相连接。