今天给大家介绍一个强大的算法模型,BERT
BERT(Bidirectional Encoder Representations from Transformers)是一种基于 Transformer 架构的深度学习模型,主要用于处理自然语言处理(NLP)问题。
BERT 由 Google AI 的研究团队在 2018 年提出,它通过双向捕获上下文信息的能力彻底改变了 NLP。与之前单向读取文本的模型不同,BERT 通过考虑左右上下文来理解句子中的单词。这种能力极大地增强了它对语言细微差别的理解,使其在各种 NLP 任务中非常有效。
BERT 如何工作
BERT 架构
BERT 建立在 Transformer 的架构之上,特别是利用了其编码器部分。
BERT 由多层自注意力和前馈神经网络组成。BERT 采用双向方法从句子中前后单词捕获上下文信息。
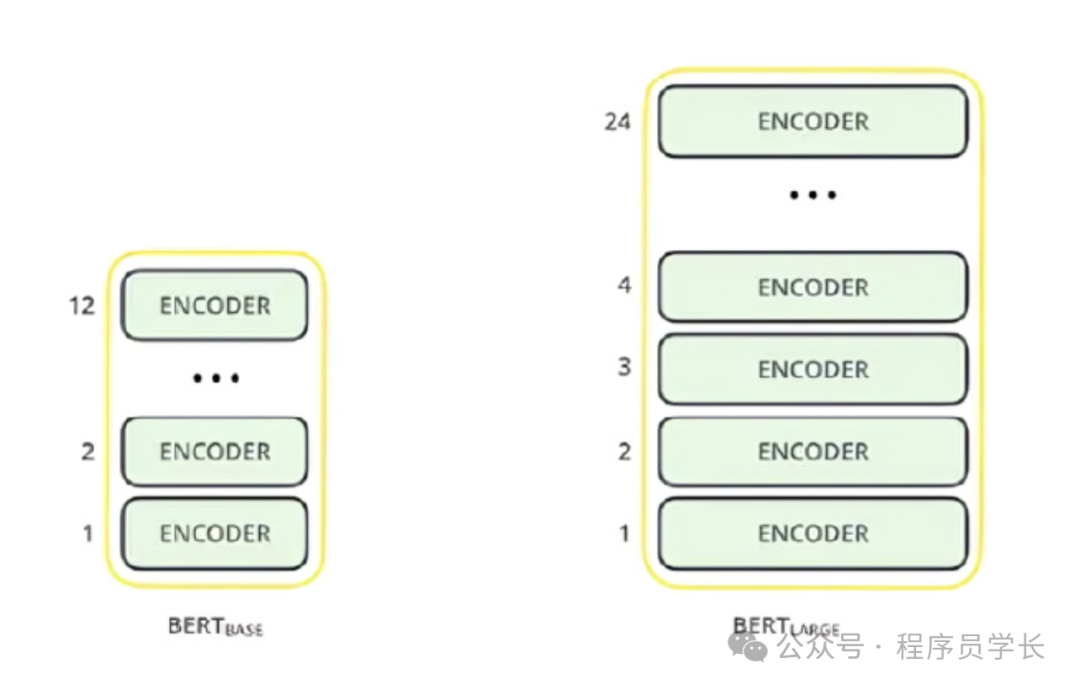
根据模型架构的规模,BERT 有四种类型的预训练版本。
-
BERT-Base(Cased / Un-Cased),12 层,768 个隐藏节点,12 个注意头,110M 个参数
-
BERT-Large(Cased / Un-Cased),24 层,1024 个隐藏节点,16 个注意头,340M 个参数
文本预处理
BERT 的开发人员添加了一组特定规则来表示模型的输入文本。
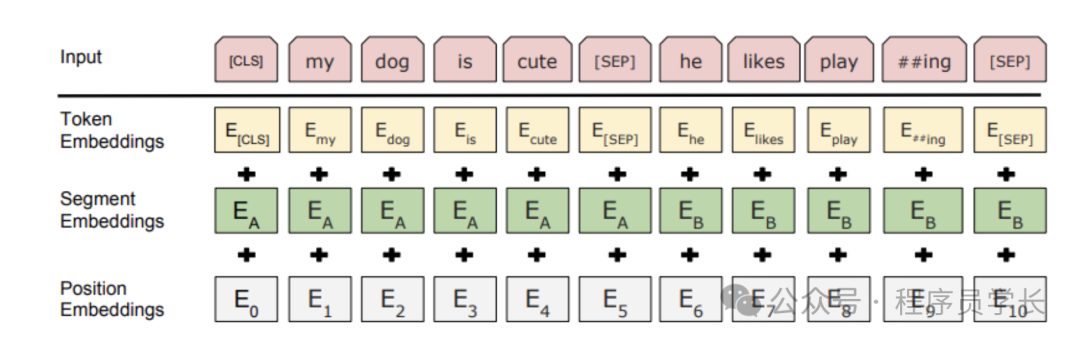
首先,每个输入嵌入都是 3 个嵌入的组合。
-
位置嵌入
BERT 学习并使用位置嵌入来表达单词在句子中的位置。添加这些是为了克服 Transformer 的局限性,因为与 RNN 不同,Transformer 无法捕获 “序列” 或 “顺序” 信息。
-
片段嵌入
BERT 还可以将句子对作为任务的输入。这就是为什么它会为第一句和第二句学习一个独特的嵌入,以帮助模型区分它们。在上面的例子中,所有标记为 的标记都属于句子 A( 也是如此)。
-
标记嵌入
这些是从 WordPiece 标记词汇表中为特定标记学习到的嵌入。
需要注意的是,我们在第一个句子的开头,将 [CLS] 标记添加到输入单词标记中,在每个句子之后,添加 [SEP] 标记。
对于给定的标记,其输入表示是通过对相应的标记、段和位置嵌入进行求和来构建的。
预训练任务
BERT 在两个 NLP 任务上进行了预训练:
-
Masked Language Model (MLM)
在这个任务中,模型的输入序列中随机选择一些单词被替换为一个特殊的 [MASK] 标记,模型的任务是预测这些被遮蔽的单词。这促使模型学习到更加深入的语言理解能力。
-
Next Sentence Prediction (NSP)
在这个任务中,给定两个句子A 和 B,模型需要预测B是否是A的直接后续。这有助于模型理解句子间的关系,对于某些特定的任务(如问答系统)尤为重要。
微调
-
过程
预训练完成后,BERT 可以通过微调来适应具体的下游任务,例如情感分析、命名实体识别等。在微调阶段,通常保持预训练期间学到的参数不变,只对输出层进行修改,以适应特定任务的需求。
-
优化
通过微调,BERT 能够利用预训练中获得的丰富语言理解能力,迅速适应并提高在特定任务上的表现。
案例分享
下面是一个使用 BERT 来进行情绪分析的案例。
1.加载预训练的 BERT 模型
这里,我们使用 BERT 基础模型的无大小写预训练版本。
from transformers import BertModel
from transformers import BertTokenizerFast  bert = BertModel.from_pretrained('bert-base-uncased')
tokenizer = BertTokenizerFast.from_pretrained('bert-base-uncased', do_lower_case=True)
2.加载数据集
这里,我们首先加载数据集并对其进行预处理。
import re
import pandas as pd  def preprocessor(text):  #convering text to lower case  text = text.lower()  #remove user mentions  text = re.sub(r'@[A-Za-z0-9]+','',text)             #remove hashtags  #text = re.sub(r'#[A-Za-z0-9]+','',text)           #remove links  text = re.sub(r'http\S+', '', text)    #split token to remove extra spaces  tokens = text.split()  #join tokens by space  return " ".join(tokens)  df = pd.read_csv('Sentiment.csv')
# perform text cleaning
df['clean_text']= df['text'].apply(preprocessor)
# save cleaned text and labels to a variable
text   = df['clean_text'].values
labels = df['sentiment'].values
print(text[50:55])
接下来,准备模型的输入输出数据。
#importing label encoder
from sklearn.preprocessing import LabelEncoder
#define label encoder
le = LabelEncoder()
#fit and transform target strings to a numbers
labels = le.fit_transform(labels)
print(le.classes_)
print(labels)  # library for progress bar
from tqdm import notebook
# create an empty list to save integer sequence
sent_id = []
# iterate over each tweet
for i in notebook.tqdm(range(len(text))):  encoded_sent = tokenizer.encode(text[i],                        add_special_tokens = True,      max_length = 25,  truncation = True,           pad_to_max_length='right')       # saving integer sequence to a list  sent_id.append(encoded_sent)  attention_masks = []
for sent in sent_id:  att_mask = [int(token_id > 0) for token_id in sent]  attention_masks.append(att_mask)  # Use train_test_split to split our data into train and validation sets
from sklearn.model_selection import train_test_split  # Use 90% for training and 10% for validation.
train_inputs, validation_inputs, train_labels, validation_labels = train_test_split(sent_id, labels, random_state=2018, test_size=0.1, stratify=labels)  # Do the same for the masks.
train_masks, validation_masks, _, _ = train_test_split(attention_masks, labels, random_state=2018, test_size=0.1, stratify=labels)  import torch
train_inputs = torch.tensor(train_inputs)
validation_inputs = torch.tensor(validation_inputs)
train_labels = torch.tensor(train_labels)
validation_labels = torch.tensor(validation_labels)
train_masks = torch.tensor(train_masks)
validation_masks = torch.tensor(validation_masks)  from torch.utils.data import TensorDataset, DataLoader, RandomSampler, SequentialSampler  # For fine-tuning BERT on a specific task, the authors recommend a batch size of 16 or 32.
# define a batch size
batch_size = 32  # Create the DataLoader for our training set.
#Dataset wrapping tensors.
train_data = TensorDataset(train_inputs, train_masks, train_labels)  #define a sampler for sampling the data during training  #random sampler samples randomly from a dataset   #sequential sampler samples sequentially, always in the same order
train_sampler = RandomSampler(train_data)  #represents a iterator over a dataset. Supports batching, customized data loading order
train_dataloader = DataLoader(train_data, sampler=train_sampler, batch_size=batch_size)  # Create the DataLoader for our validation set.
#Dataset wrapping tensors.
validation_data = TensorDataset(validation_inputs, validation_masks, validation_labels)  #define a sequential sampler
#This samples data in a sequential order
validation_sampler = SequentialSampler(validation_data)  #create a iterator over the dataset
validation_dataloader = DataLoader(validation_data, sampler=validation_sampler, batch_size=batch_size)
3.定义模型架构
#importing nn module
import torch.nn as nn  class classifier(nn.Module):  #define the layers and wrappers used by model  def __init__(self, bert):  #constructor  super(classifier, self).__init__()  #bert model  self.bert = bert   # dense layer 1  self.fc1 = nn.Linear(768,512)  #dense layer 2 (Output layer)  self.fc2 = nn.Linear(512,3)  #dropout layer  self.dropout = nn.Dropout(0.1)  #relu activation function  self.relu =  nn.ReLU()  #softmax activation function  self.softmax = nn.LogSoftmax(dim=1)  #define the forward pass  def forward(self, sent_id, mask):  #pass the inputs to the model    all_hidden_states, cls_hidden_state = self.bert(sent_id, attention_mask=mask, return_dict=False)  #pass CLS hidden state to dense layer  x = self.fc1(cls_hidden_state)  #Apply ReLU activation function  x = self.relu(x)  #Apply Dropout  x = self.dropout(x)  #pass input to the output layer  x = self.fc2(x)  #apply softmax activation  x = self.softmax(x)  return x  device="cuda:0"
for param in bert.parameters():  param.requires_grad = False
#create the model
model = classifier(bert)  #push the model to GPU, if available
model = model.to(device)
4.定义优化器和损失函数
# Adam optimizer
optimizer = torch.optim.Adam(model.parameters(), lr = 0.001)  import numpy as np
from sklearn.utils.class_weight import compute_class_weight
#class_weights = compute_class_weight('balanced', np.unique(labels), y=labels)
class_weights = compute_class_weight(class_weight = "balanced", classes= np.unique(labels), y= labels)
print("Class Weights:",class_weights)  # converting a list of class weights to a tensor
weights= torch.tensor(class_weights,dtype=torch.float)
# transfer to GPU
weights = weights.to(device)
# define the loss function
cross_entropy  = nn.NLLLoss(weight=weights)
5.模型训练与评估
import time
import datetime
# compute time in hh:mm:ss
def format_time(elapsed):  # round to the nearest second.  elapsed_rounded = int(round((elapsed)))  # format as hh:mm:ss  return str(datetime.timedelta(seconds = elapsed_rounded))
import time
#define a function for training the model
def train():  print("\nTraining.....")    #set the model on training phase - Dropout layers are activated  model.train()  #record the current time  t0 = time.time()  #initialize loss and accuracy to 0  total_loss, total_accuracy = 0, 0  #Create a empty list to save the model predictions  total_preds=[]  #for every batch  for step,batch in enumerate(train_dataloader):  # Progress update after every 40 batches.  if step % 40 == 0 and not step == 0:  # Calculate elapsed time in minutes.  elapsed = format_time(time.time() - t0)  # Report progress.  print('  Batch {:>5,}  of  {:>5,}.    Elapsed: {:}.'.format(step, len(train_dataloader), elapsed))  #push the batch to gpu  batch = tuple(t.to(device) for t in batch)  #unpack the batch into separate variables  # `batch` contains three pytorch tensors:  #   [0]: input ids   #   [1]: attention masks  #   [2]: labels   sent_id, mask, labels = batch  # Always clear any previously calculated gradients before performing a  # backward pass. PyTorch doesn't do this automatically.   model.zero_grad()          # Perform a forward pass. This returns the model predictions  preds = model(sent_id, mask)  #compute the loss between actual and predicted values  loss =  cross_entropy(preds, labels)  # Accumulate the training loss over all of the batches so that we can  # calculate the average loss at the end. `loss` is a Tensor containing a  # single value; the `.item()` function just returns the Python value   # from the tensor.  total_loss = total_loss + loss.item()  # Perform a backward pass to calculate the gradients.  loss.backward()  # Update parameters and take a step using the computed gradient.  # The optimizer dictates the "update rule"--how the parameters are  # modified based on their gradients, the learning rate, etc.  optimizer.step()  #The model predictions are stored on GPU. So, push it to CPU  preds=preds.detach().cpu().numpy()  #Accumulate the model predictions of each batch  total_preds.append(preds)  #compute the training loss of a epoch  avg_loss     = total_loss / len(train_dataloader)  #The predictions are in the form of (no. of batches, size of batch, no. of classes).  #So, reshaping the predictions in form of (number of samples, no. of classes)  total_preds  = np.concatenate(total_preds, axis=0)  #returns the loss and predictions  return avg_loss, total_preds
#define a function for evaluating the model
def evaluate():  print("\nEvaluating.....")  #set the model on training phase - Dropout layers are deactivated  model.eval()  #record the current time  t0 = time.time()  #initialize the loss and accuracy to 0  total_loss, total_accuracy = 0, 0  #Create a empty list to save the model predictions  total_preds = []  #for each batch    for step,batch in enumerate(validation_dataloader):  # Progress update every 40 batches.  if step % 40 == 0 and not step == 0:  # Calculate elapsed time in minutes.  elapsed = format_time(time.time() - t0)  # Report progress.  print('  Batch {:>5,}  of  {:>5,}.    Elapsed: {:}.'.format(step, len(validation_dataloader), elapsed))  #push the batch to gpu  batch = tuple(t.to(device) for t in batch)  #unpack the batch into separate variables  # `batch` contains three pytorch tensors:  #   [0]: input ids   #   [1]: attention masks  #   [2]: labels          sent_id, mask, labels = batch  #deactivates autograd  with torch.no_grad():  # Perform a forward pass. This returns the model predictions  preds = model(sent_id, mask)  #compute the validation loss between actual and predicted values  loss = cross_entropy(preds,labels)  # Accumulate the validation loss over all of the batches so that we can  # calculate the average loss at the end. `loss` is a Tensor containing a  # single value; the `.item()` function just returns the Python value   # from the tensor.        total_loss = total_loss + loss.item()  #The model predictions are stored on GPU. So, push it to CPU  preds=preds.detach().cpu().numpy()  #Accumulate the model predictions of each batch  total_preds.append(preds)  #compute the validation loss of a epoch  avg_loss = total_loss / len(validation_dataloader)   #The predictions are in the form of (no. of batches, size of batch, no. of classes).  #So, reshaping the predictions in form of (number of samples, no. of classes)  total_preds  = np.concatenate(total_preds, axis=0)  return avg_loss, total_preds
接下来,对模型进行训练。
#Assign the initial loss to infinite
best_valid_loss = float('inf')  #create a empty list to store training and validation loss of each epoch
train_losses=[]
valid_losses=[]  epochs = 5  #for each epoch
for epoch in range(epochs):  print('\n....... epoch {:} / {:} .......'.format(epoch + 1, epochs))  #train model  train_loss, _ = train()  #evaluate model  valid_loss, _ = evaluate()  #save the best model  if valid_loss < best_valid_loss:  best_valid_loss = valid_loss  torch.save(model.state_dict(), 'saved_weights.pt')  #accumulate training and validation loss  train_losses.append(train_loss)  valid_losses.append(valid_loss)  print(f'\nTraining Loss: {train_loss:.3f}')  print(f'Validation Loss: {valid_loss:.3f}')  print("")
print("Training complete!")
接下来,对模型进行评估。
# load weights of best model
path='saved\_weights.pt'
model.load\_state\_dict(torch.load(path))
# get the model predictions on the validation data
# returns 2 elements- Validation loss and Predictions
valid\_loss, preds = evaluate()
print(valid\_loss)  from sklearn.metrics import classification\_report
# Converting the log(probabities) into a classes
# Choosing index of a maximum value as class
y\_pred = np.argmax(preds,axis=1)
# actual labels
y\_true = validation\_labels
print(classification\_report(y\_true,y\_pred))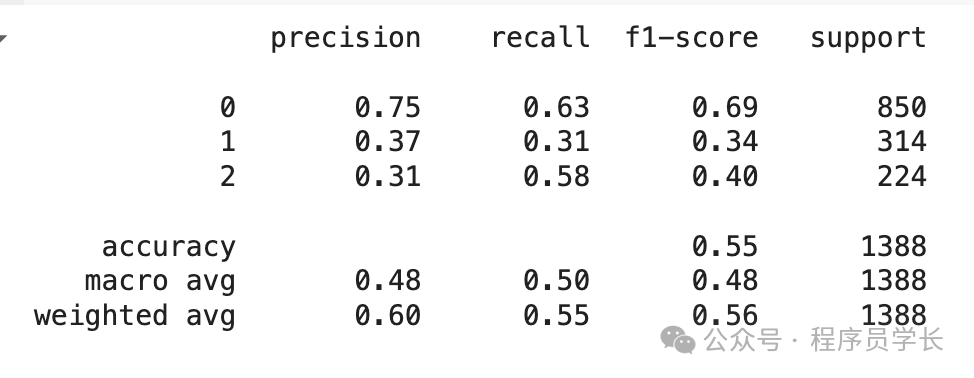
如何学习AI大模型?
作为一名热心肠的互联网老兵,我决定把宝贵的AI知识分享给大家。 至于能学习到多少就看你的学习毅力和能力了 。我已将重要的AI大模型资料包括AI大模型入门学习思维导图、精品AI大模型学习书籍手册、视频教程、实战学习等录播视频免费分享出来。
这份完整版的大模型 AI 学习资料已经上传CSDN,朋友们如果需要可以微信扫描下方CSDN官方认证二维码免费领取【保证100%免费】

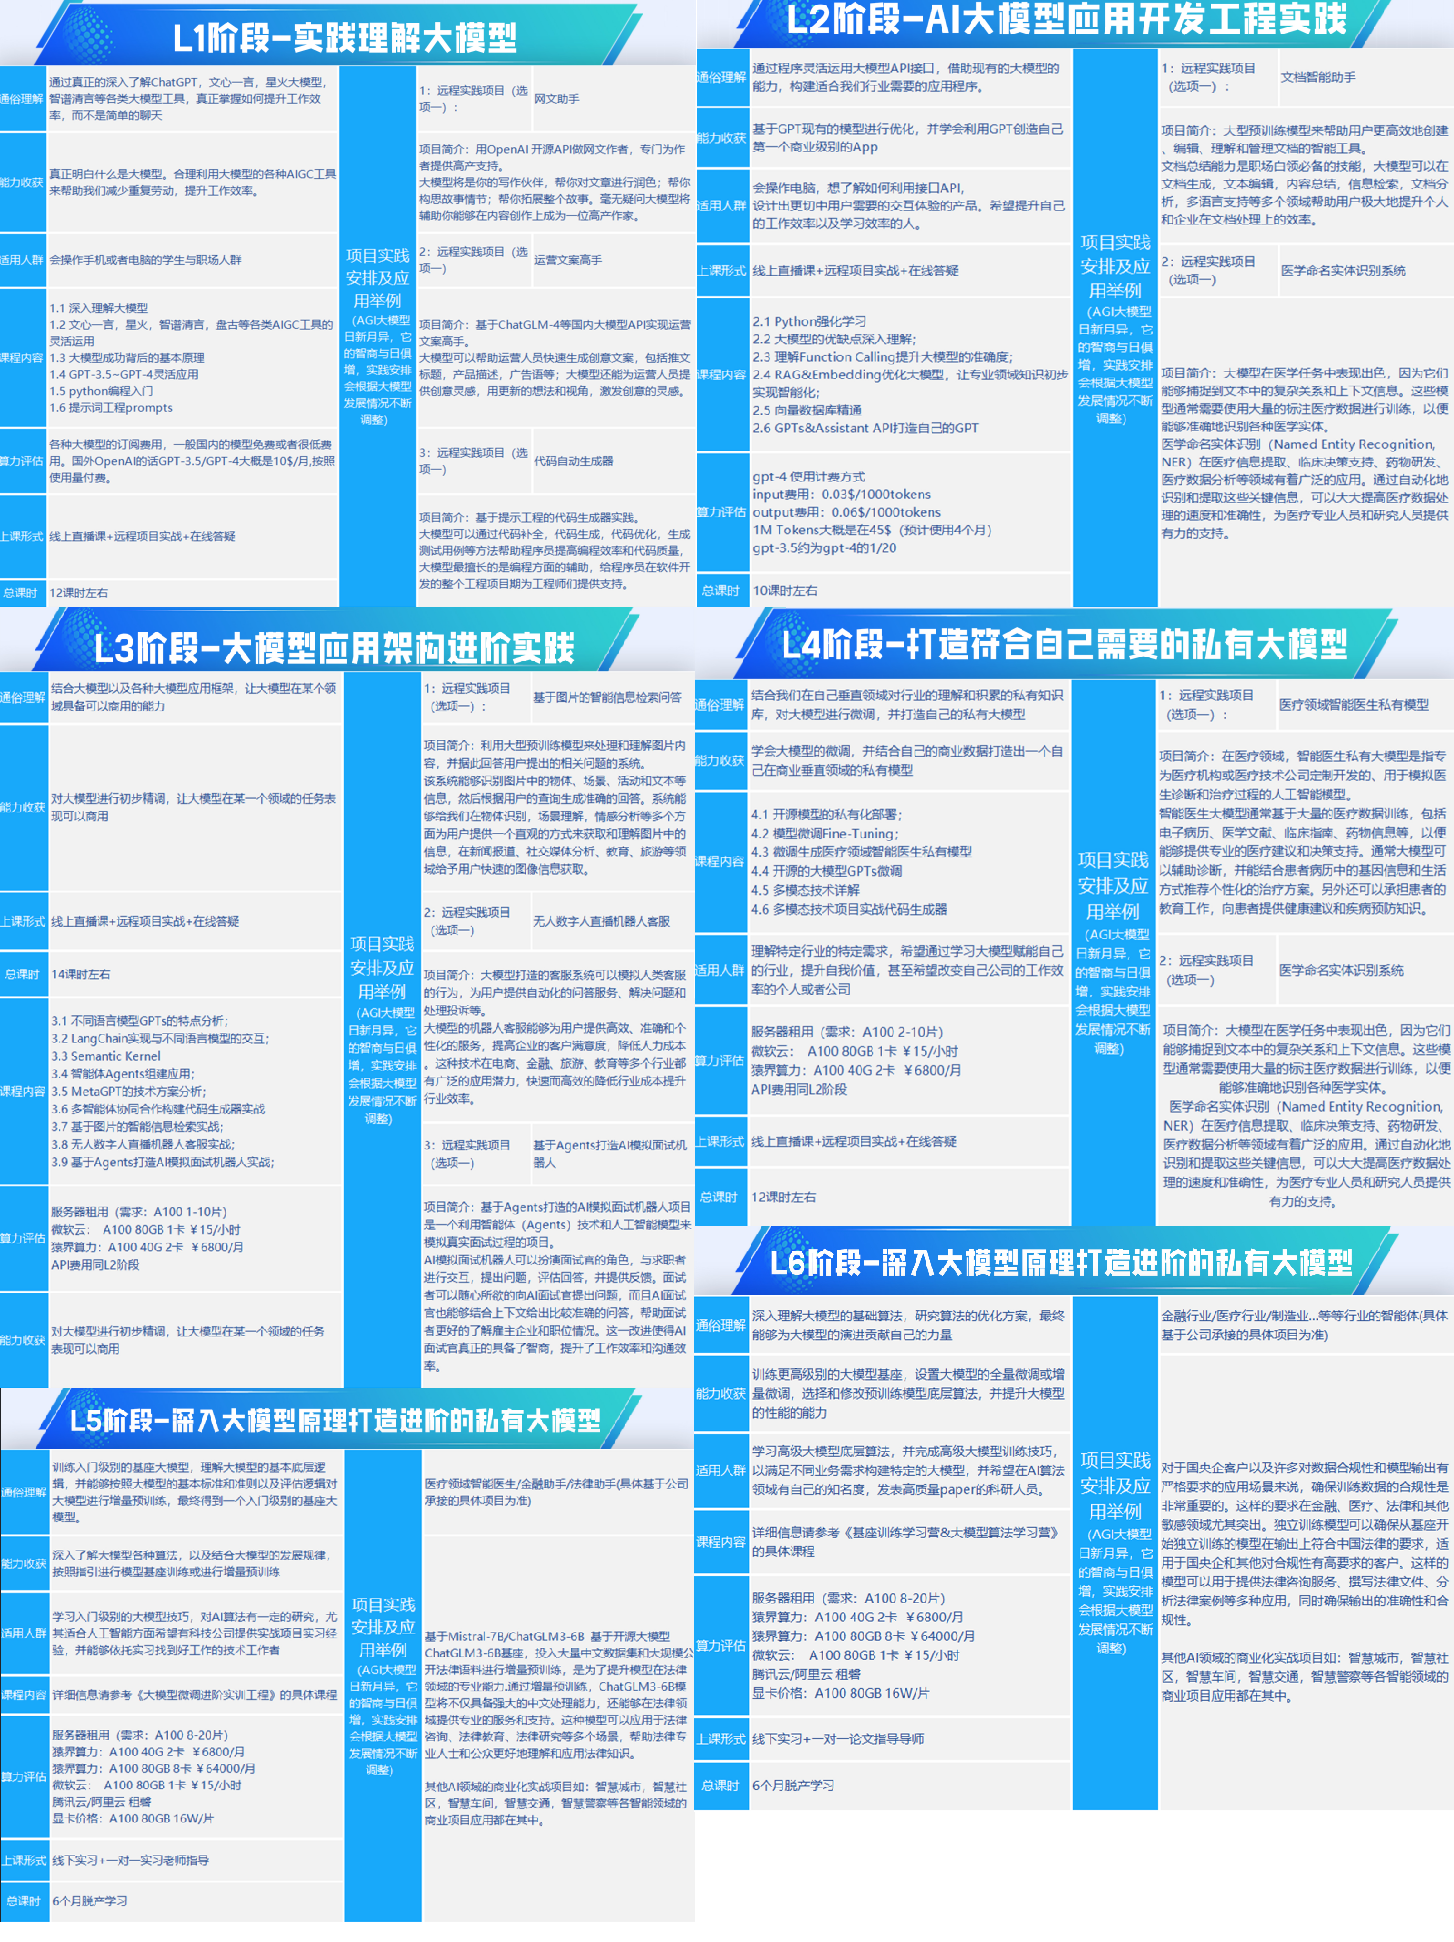
一、全套AGI大模型学习路线
AI大模型时代的学习之旅:从基础到前沿,掌握人工智能的核心技能!
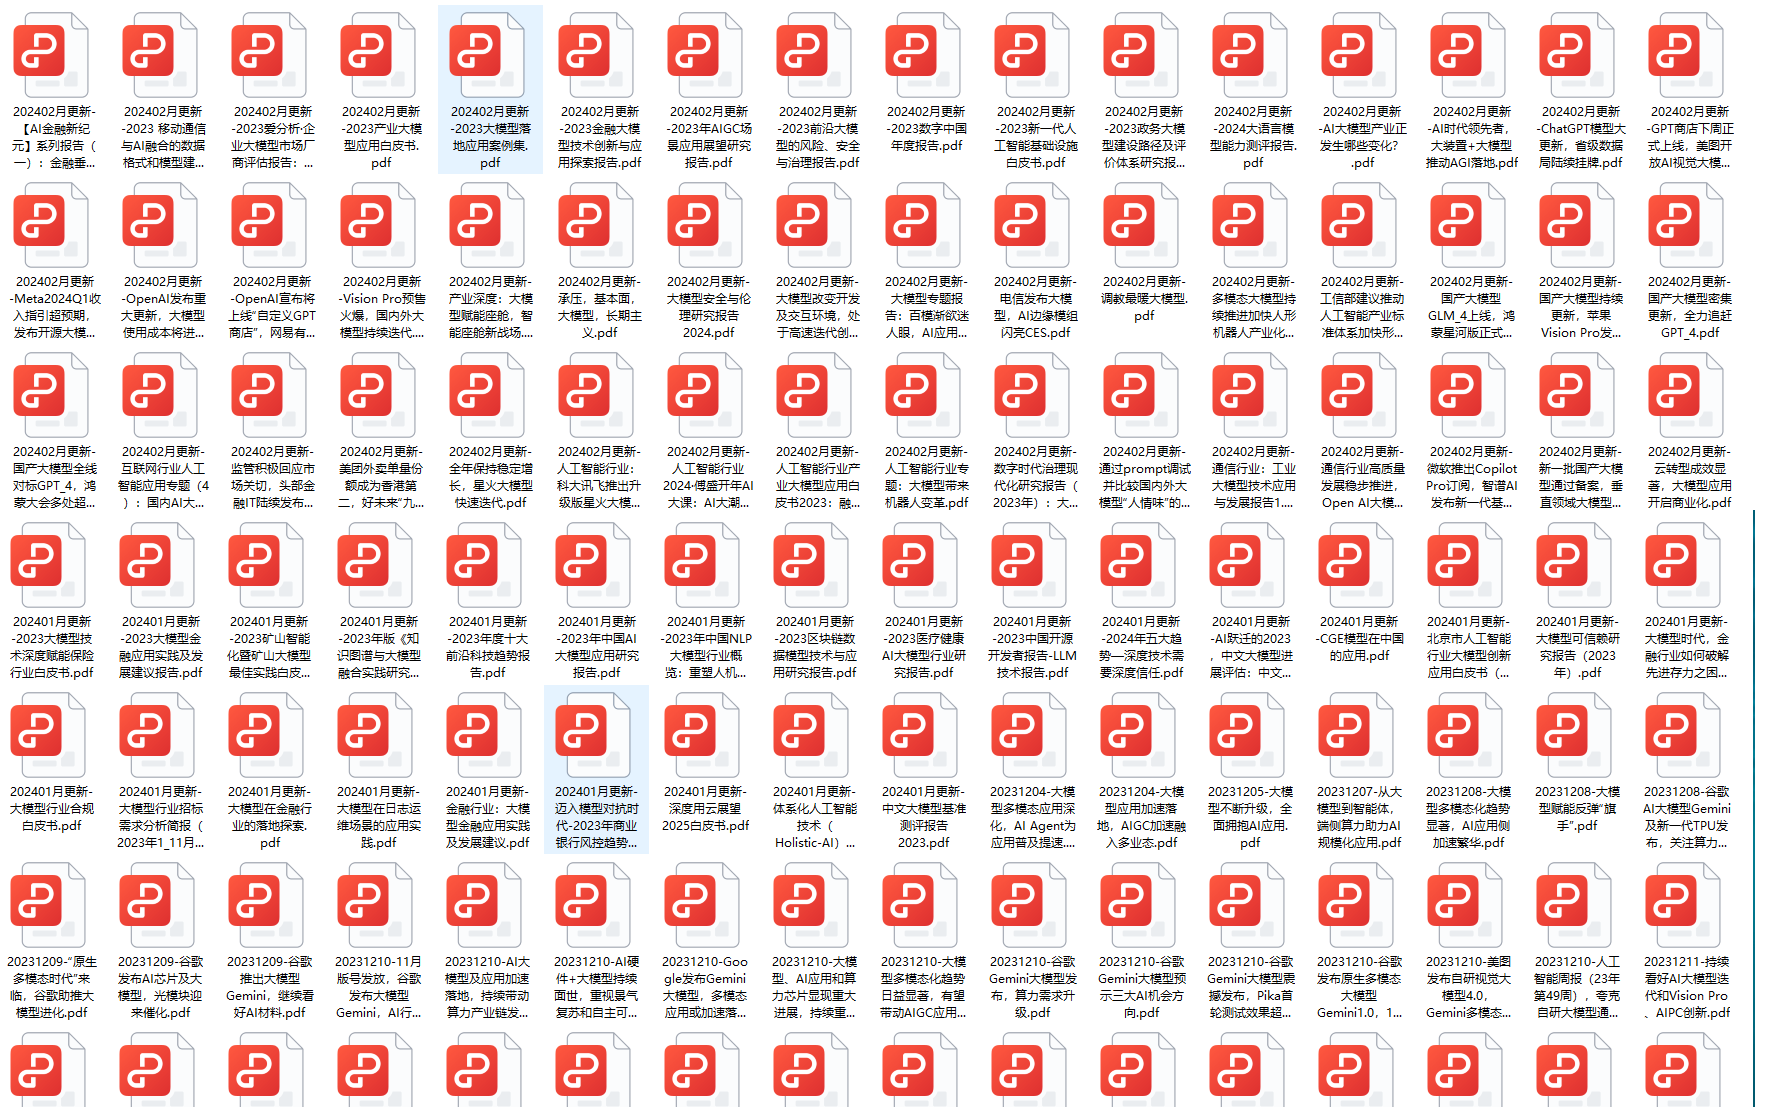
二、640套AI大模型报告合集
这套包含640份报告的合集,涵盖了AI大模型的理论研究、技术实现、行业应用等多个方面。无论您是科研人员、工程师,还是对AI大模型感兴趣的爱好者,这套报告合集都将为您提供宝贵的信息和启示。
三、AI大模型经典PDF籍
随着人工智能技术的飞速发展,AI大模型已经成为了当今科技领域的一大热点。这些大型预训练模型,如GPT-3、BERT、XLNet等,以其强大的语言理解和生成能力,正在改变我们对人工智能的认识。 那以下这些PDF籍就是非常不错的学习资源。

四、AI大模型商业化落地方案

作为普通人,入局大模型时代需要持续学习和实践,不断提高自己的技能和认知水平,同时也需要有责任感和伦理意识,为人工智能的健康发展贡献力量。